

They’re more like guidelines, really, but we cruisers do have them: good rules of thumb to keep you and your boat going. “Find that flange!” is an important one, as it can mean the difference between carrying on with a happy, humming engine, or sitting stuck in a rut with an engine who can’t keep his cool. No bueno.

After Phillip and I received the fantastic news that Plaintiff’s Rest had gallantly weathered Hurricane Dorian and was floating happy and safe and awaiting for our return in Great Harbour Cay, we eagerly started planning our cruising this season. While it’s fun to think about all of the interesting places we will go and things we will see or eat when we get there, to ensure we can actually get there (in theory anyway), our cruise-planning often begins with the following important questions:
- What work needs to be done on the boat before we leave the dock?
- What boat parts/supplies do we need to bring to the boat to do that work, versus what we can acquire once we arrive?
- What gear or spares do we need to replenish before we shove off and where can we get those?
She’s a boat, right? If you want to go cruising, you’ve got to keep her safe and seaworthy, which requires a great deal of forethought and work. Cruising is every bit of what they say about “working on your boat in exotic places.” In fact, I’m pretty sure that’s Cruisers’ Rule #1, or in the top ten, at least.

When Phillip and I asked ourselves these questions as we were preparing to return to the boat after Dorian, one of the first tasks that came to mind was the need to change the oil in the engine and inspect/replace the impeller before we set off to cruise further down into the Bahamas. Knowing we had plenty of oil on the boat and the kit to do this, as well as plenty of spare impellers, we were fully stocked to take on this one with everything we already had on the boat. All, she needed was us! So, we hopped on a plane in November and happily made our way back to our beautiful floating home!

My (cruiser’s) bags are packed, I’m ready to do! 
Off we go! 

Going from the big Delta plane to the itty-bitty LeAir flight (from Nassau to Great Harbour Cay) is a bit of a change! 
Can you see the shadow of the plane in the clouds? Cool huh!
I cannot tell you how grateful we both were to finally get back to our boat in the wake of Dorian and seeing in person that she survived. Surviving hurricane season can be a very scary thing for a boat, and its owners.


Once we got settled aboard, and were able to get the main canvas out of the saloon and back up on the deck (re-installing the bimini and dodger, mainsail and stack pack, getting Wendy (our head sail back on), etc., Phillip and I were ready to dig into the necessary engine work.

Phillip in his coal-miner get-up removing the floorboards. 
We keep many spares and larger tools here under the floorboards in our saloon.
We have a Westerbeke 27A on our boat, and we strive to change the oil every 50-75 hours, closer to 50 than 75 when we can help it. I’ve written about the type of pump/oil container we use on our boat to extract the used oil out of the engine and contain it until we can walk it to a proper oil-dispensing location.
How We Change the Oil On Our Boat
Phillip and I had quite the adventure in St. Petersburg a few years back tracking down this handy little pump from a Back-Door Marine Supply Guy!

I’ve also published an article and video previously showing how we change the oil in our engine on the boat if you are interested here: Maintenance in Marsh Harbour – How We Change the Oil On the Boat. That also includes one way, in particular, on how NOT to do it, when we suffered quite the nasty oil spill on Plaintiff’s Rest. Good times. The takeaway: do NOT tip that pump more than 90-degrees horizontal or it will squirt oil out the handle the next time you pump. That’s Cruisers’ Rule #149, I believe.

Our Raw and Fresh Water Cooling Systems
After we got the oil changed, we next set our sights on the impeller. For those of you somewhat new to engine maintenance (which I myself was just a few short years ago), this is how I wish someone would have explained it to me … in Annie Speak, so to speak. Most diesels have primarily two cooling systems: the raw water system and the “fresh” water system (which in our boat we fill with antifreeze, aka coolant (that Ghostbuster green stuff)). The raw water system uses a rubber wheel (the impeller) that spins to create suction pulling raw (sea) water into the heat exchanger.


The coolant in the fresh water system is completely contained (well, when you don’t have any minor coolant leaks – very common, particularly around the thermostat on our boat), and is moved through heat exchanger (where—just as the name implies—warmer coolant from the engine is cooled by the raw water running swiftly on the other side of it in the exchanger) and then recirculated through the engine via a pump that is spun by the alternator belt on the back of the engine.

I am explaining all of this here for the benefit of newbie cruisers (which I, in many ways, still consider myself), and for future reference as you will learn soon about an issue we had with this cooling system in future travels.
We’ll Have Some Fresh Water Cooling System Lessons to Share Soon – Stay Tuned!
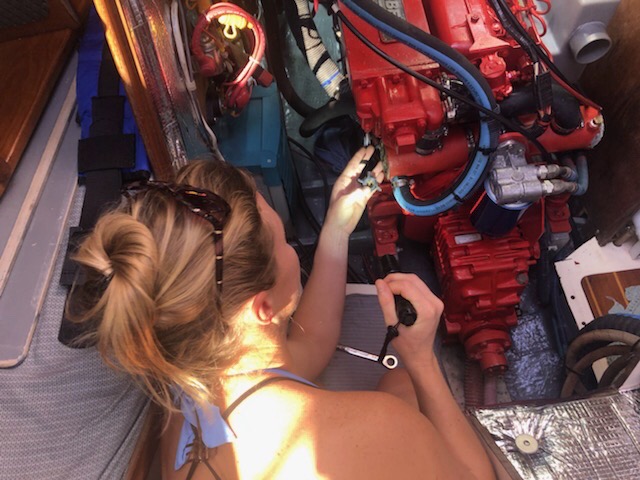
Clever foreshadowing will have to be forfeited here for the loftier goal of sharing and educating as it was mine and Phillip’s replacement of the impeller on the raw water pump before we left Great Harbour Cay that reminded me of this important little nugget undoubtedly worth sharing (or, technically, I should say reiterating as I have mentioned it here before). I urge you cruisers: when swapping out your impellers, if you notice some of the flanges on your old impeller have broken off (common), there is one critical thing you must do:
Cruisers’ Rule #42: FIND THOSE MISSING FLANGES!
It can be tempting to ignore them. I completely understand. They’re broken off. They’re gone. You’re putting in an entirely new impeller, so who gives a … You should give a. That’s who. I’ve documented several instances where Phillip and I ourselves or we have seen other boaters suffer some serious consequences from a thrown flange that was not tracked down and later lodged itself in critical locations that impeded water flow and prevented the raw water system from working properly.


At the very least, a wayward flange can easily cause your engine to overheat. Bad enough. But, in one rather severe case (Yannick’s!) it melted his muffler! Zoiks!


I don’t want a melted muffler, do you? But, Phillip and I learned another small lesson during this impeller exchange when we noticed two flanges thrown and had to go track them down through the raw water system. That is:
Look In the Easy Places First
Sound silly? Perhaps it is, but our gut instinct was to start at the point closest to the pump and work our way toward the heat exchanger. And, with this thinking in mind, we almost (alllmmooosst! but thankfully we didn’t) disconnect the hose from the pump to the exchanger first. This would have been a several-hour rigorous chore trying to get that thing off and back on again. And, would have been completely unnecessary in hindsight. What I learned during this impeller maintenance session was that the heat exchange end caps are far easier to remove than hoses (many of which have been forged onto the barb after years of pressure). The end caps are just simple bolts. Very easy to remove (and replace the gaskets once you’re in there).

The Heat Exchanger Acts a Bit Like a Pea Trap
Also, the ends of the heat exchanger (on ours anyway and I’m sure it’s similar on others) act a bit like little pea-traps under the sink. It’s the most likely place something that “goes down the drain” (or in this case, goes down the hose from the pump to the exchanger) is going to swirl around and get caught.

Thankfully, after loosening the hose clamp on the hose from the pump the exchanger and giving it several hard tugs, my eyes traveled over to the much-easier-to-remove bolt on the starboard cap of the heat exchanger, and I suggested to Phillip: “Maybe let’s check the easy place first.”
Now, did I suggest this out of wisdom? No, it was pure “I don’t want to wrestle this anaconda-hose anymore” laziness. But, it still turned out to be the right thing to do! After we clamped the hose back up and popped the end of the heat exchanger off, our two missing flanges were sitting nice and accessible right there for us. Whew! Got ‘em!

The chase is not always that easy, and rarely what we would exactly call “fun,” but finding those missing flanges can mean the difference between continued cruising and camping out at the dock with an angry engine. That’s why it’s a Cruiser’s Rule!

Now that we were back aboard and had our beautiful boat up and running again, it was time for Phillip and I to focus on the way-more-fun side of cruise-planning: Where to? Next up, we’ll share our thoughts and planning on how best to make our way from the Bahamas to the BVIs. Let the thorny debate begin!
Thanks Annie. I always enjoy your posts. Our N35 also has the W27 engine. How do you normally replace the impeller? Do you normally take the pump off before removing the impeller? We’ve been taking the impeller out with the pump in place, but it’s not easy. The combination of the reach and the amount of force required seem to make me feel like maybe we aren’t doing it the way that Mr. Westerbeke intended. Cheers!
Great question Thom! And, thanks for the kind words. I’m glad you’ve been enjoying the blog. Working on our raw water pump is always an exercise in shoulder elasticity. It is definitely a hard spot to get to. Trying to work those six little bolts in and out, lying on the floor with one arm outstretched to the engine is not fun. And making that little notch on the back of the impeller line up right so it ‘clicks in’ is frustrating. But, we do it how you do it (replacing the impeller with the pump attached). It is hard, but I think removal of the entire pump on and off (as we’ve done that several times before too) with the hoses and all is likely a tougher chore. The hoses on ours are in very tight spots and taking those on and off would be a monster job. I don’t think “Mr. Westerbeke” (that made me laugh : ) had our comfort in mind when designing the engine, but that’s okay, as she’s such a tough engine. Hope that helps. Thanks for following along!
Thanks Annie, I was hoping for a magic bullet, but knowing we are not crazy is comforting. We are in Miami and heading to Bahamas in January, so perhaps Kath and I with get to enjoy a sundowner with you and Phillip sometime in 2020. All the best!
That would be wonderful. The Bahamas in January are a bit cold and windy. (Bring some layers!) And let us know where you end up. Fair winds!
Hi Annie , entertaining and informative as usual! I read/watch many folks with overheating or impeller problems. ( what else is there to talk about?)Chasing for the rubber blades ( or flanges , or finger) is a tough problem and likely to open up new places for leaks to start. FYI quite a few engines, Volvo comes to mine, use rubber boots on the ends of the heat exchangers that are custom and rubber so if they go not easy to fix or find spares……a roll of self-amalging tape might work for a while!
But what I was thinking was that a small filter or strainer,inline with the pump outlet, could be a good up grade. It would stay clean most of the time and not restrict flow….unless the impeller started to break up,then you could easily see the pieces and stop them going into strange places in the engine. If you had an overheating issue a quick glance at the filter bowl would tell you if your problem was the raw water pump flow or heaven forbid a different pump causing your problem!
I’ll have to see if it’s practical on my smaller Westy but I think it could be in the hose just before the heat exchanger. Cheers Warren
I actually really like that idea. I’ve told Phillip many times I wish the cover on the raw water pump was clear so you could see whether the impeller is breaking up or not because taking that cover off (just to find out) is a pretty big chore. But, I’m sure the cover needs to be stronger than something clear so … c’est la vie. I would like to think everything you disassemble you could reassemble without creating any new leaks. I would hope. But, we’ve definitely seen the consequences of NOT looking for that missing flange when it lodged itself further down the line and impeded flow. Overall, though, we are very pleased with the engine and love that it is easy to work on ourselves. Thanks for chiming in Warren. Cheers (and happy holidays) to you as well!