

At first, we couldn’t really get our “heads” wrapped around it, but once the system started to make sense (a simple composting unit vented to the outside), and we realized all of the nasty things we were about to remove from the boat, Phillip and I were all for it! As you can imagine, we asked around to many, many boat owners about the pros and cons of going with a composting head, and the really far-fetched cons we heard came from boatowners who didn’t even have a composting head on their boat! Psssshhh …

From those owners who had swapped to a composting head (including Andy and Mia from 59-North), the only true con that was noted was the head is a bit taller and there is the occasional hard-over tack that might prevent urine from making it to the bin. “But, in the rare event that happens,” Mia told me, “you just straighten the boat up for a minute while you do your business, and that’s that.” Most owners with composting heads told us they were thoroughly pleased with the function and smell (which for most is non-existent, but even those who did not vent theirs told us the light mulch smell was far preferred over the previous smell of the holding tank and it’s many nasty hoses). And, I don’t think I’ve heard of a single boat owner with a composting head going back to a manual toilet and a holding tank, which should tell you a lot. In addition, many RV’ers raved about their composting heads, so helpful articles like this one from RV lifestyle helped to inform our decision as well.
While the install was a little tricky for us (mostly because we wanted to route the venting in a way that turned out very clean using the old channels that were designed for the propane water heater that was previously on the boat), it was really not that hard. I did most of it on my own with little oversight. Is it a stinky, shitty job? Yes. The removal, anyway. But, it’s no worse than changing out your holding tank hoses which has to be done every so-many years, and you can take great comfort in knowing that is the last time you will ever have to experience the pleasant feel of having your hands covered in your own … stuff! You’re welcome for that odorific memory. That was a fun day on Plaintiff’s Rest.

Phillip and I have also been using the new composting head on the hook after our install and we are thrilled with it. I will admit, the urine bin (we opted for the small one) is a bit small, only a gallon. And, it turns out, after an evening of wine, that’s about equivalent to Annie’s bladder. So, I do have to empty that bin a couple of times a day, but it’s like a 30-second chore, so no big deal. Regarding the “mulch,” we were told each coco brick lasts about 3-4 weeks with regular use. You can get five bricks for around $20 through Amazon. So, the cost is roughly $4-5/month. Each brick is about 8” long, 4” wide and 2-3” inches tall. So, a six-month supply likely fits in the size of a milk crate. I can assure a full year’s supply would be a mere fraction of the space our 25-gallon holding tank previously occupied.

A good friend and fellow captain and his wife (Russell and Lynn, hello!) who have used a composting head for years advised you soak one brick in one quart of fresh water overnight. It expands to about twice its size (roughly two gallons worth of material). Then you break it up into the composting bin and you’re set for about 3.5-4 weeks of use. When you notice the bin has roughly exceeded its halfway point (the crank inside is a good indicator), it’s time to dump!
Phillip and I chose the Airhead because it was the right aesthetic and size for our boat, and I cannot say enough nice things about the good folks at Airhead (particularly my buddy Geoff, shout out!) who answered my many, many, literally dozens of questions. They were very responsive and considerate (and complimentary of my install! Thanks for the kind words Geoff!). If you are on the fence about swapping to a composting head, feel free to send us any questions or hit up my buddy Geoff at Airhead, here is his email. While you are considering, it is helpful to think of the many benefits we have found (that I did not anticipate when we were merely considering it) from our swap to a composting head.
Pros of Swapping to a Composting Head
- You no longer carry your shit along with you everywhere in a sloshing stinky tank under your bed (let’s just start there).
- You remove an entire electrical system and thru-hull from the boat (the macerator for pumping overboard).
- You gain space and better smell quality in all lockers that contained any element of your old system (the Y-valve, the macerator, the holding tank, and all the hoses).
- You never have to go to the fuel dock again just to pump out.
- You never have to pump out again. Yippee!
- You don’t have to worry about an overflow, rupture, or leak from the holding tank.
- You never again have to suffer through the smell of said overflow, rupture or leak from the holding tank.
- You’ll never again have to change out the holding tank hoses or joker valve.
- You’ll never again have to worry about or unclog a clogged head.
- Most guests will refrain from use because it freaks them out. Yippee!
- No more pumping after every donation. Whon-shee, whon-shee, whon-shee.
- The whole boat smells so, so much better.
- There’s less weight aboard. (For us this was particularly beneficial removing weight near the bow, where we work to counter-balance our heavy 200 feet of chain in the bow).
- We never put salt water in our old head (as we heard it contributed to smell) so we now no longer have to keep a jug of fresh water in the head for pumping.
- You’ll never again have to help … things … through the joker flap. Isn’t that fun?
- With good aim, you’ll never again have to clean a shitty bowl. Ever. Yippee!
And, just in the pursuit of fairness, here are some of the cons we have heard about and/or experienced ourselves.
Cons of Swapping to a Composting Head
- The head is a bit taller, so the “comfort factor” of having your feet lower can play a role (it does not for me, but seems to more for men).
- You have to empty the urine bin often and should check it each time before you take a leak. It sucks when it overflows (yes, we’ve already done that).
- Some people have told us they worry about violating some old boat regulation that requires you have a holding tank. In the U.S., a composting head is a USCG-sanctioned Type III marine sanitation device, so you’re fine here. With respect to other countries, as one follower said: “I would argue the composting head is a holding tank.” Smart guy. My lawyer brain would agree with that. We’ve never heard of anyone ever actually being cited or otherwise penalized under this alleged old regulation.
- It may prove difficult to urinate on certain tacks. (But the simple fix for this I will call the “Mia Rule” above: straighten the boat out for a minute, do your business, get back on tack).
- You have to find a place to dump your compost roughly once a month. While underway, you can throw it overboard anywhere outside three nautical miles from the nearest land. While ashore, you can (if you want the earth to get some use out of it) donate it to any garden, flowerbed, or natural earthy area, or otherwise safely dispose of it. Simply follow local regulations and good judgment when disposing anywhere.
So, let’s dig into this already as I want to share the full details or our install and hopefully dispel any erroneous myths you all my have about composting heads. If you may recall, this entire project emanated (ooh, great word) just as the smell did on our boat one morning when we inadvertently overflowed our holding tank. Good times.
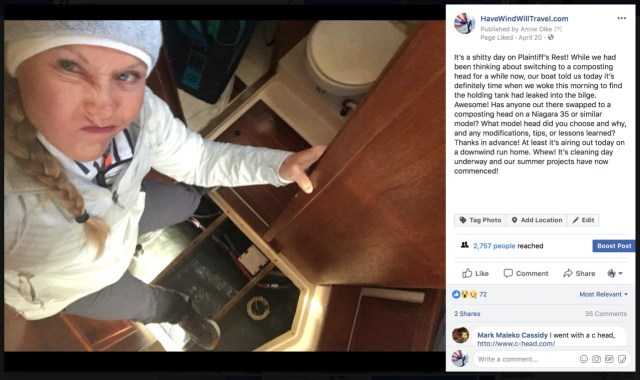
Here is a link to that Facebook thread if you want to read everyone’s input on swapping to a composting head.
We were on our way back from the Bahamas and, after talking to many cruisers about it, primarily Russell and Lynn, we decided no more turd tank and we added it to our Post-Bahamas Boat Projects. But, simply deciding to explore the option does not make it possible on our boat. We do have a rather small area in our head. Our first obstacle in all of this was size. Was a composting head going to fit?


After researching all three major brands (C-head, Airhead, and Nature’s Head), we found the Airhead met our needs aesthetically and size-wise. The Airhead was a bit more stylish (I now know toilets can be stylish) than the C-head and was not quite as monstrous as the Nature’s Head. I sent these initial photos to the folks at Airhead asking their thoughts. Our main concern was our platform, which is approximately 12” aft, but it narrows down to only 4” going forward. The flat area we were working with was really rather small.

Geoff at Airhead got back to me immediately and asked for more information about our space back there. I did some more measuring and created this rough diagram for him.

Geoff, before he even knew we would be a customer, took the time to create a CAD drawing showing various configurations where he thought the Airhead, with the “hull shape” on the back (to match our slanted hull), would work.


These diagrams gave us confidence, but it was still a tough call to make because you cannot really tell whether the composting head is going to fit nicely in your head until you remove the old toilet. But, you don’t really want to remove the old toilet until you know … It was a bit of a Catch 22. But, we had a friend who owns a Catalina 28 (the one we helped deliver back in 2017) who had just made the decision to swap to a composting head and he let us “play around” with his (man, that sounds awful) by holding it up in our current space.


It looked do-able, so Phillip finally gave me the go. We ordered our Airhead to have it in time while we would be in the shipyard this past summer and could do the install. Annie’s first solo job when we hauled out was to remove the old head.
“I’m all over it!” Shipyard Annie said!

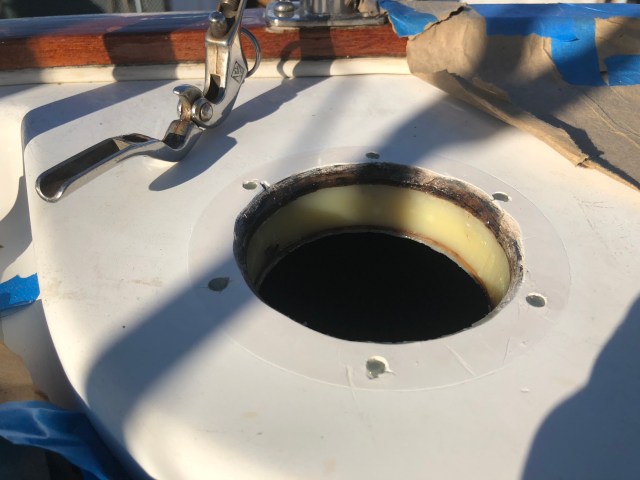
Thankfully, the old toilet was far easier to remove than I imagined. Day One at the shipyard, even after we hauled out, dropped the rudder and removed the engine exhaust elbow, there was still a couple of hours for Annie to get this beast off. I was thrilled to find it was only mounted with four bolts on the bottom plate and there is a hose that goes to the pump (to pull raw water into the bowl, which, like I said, we never did because we heard it contributed to smell).

And, while we, of course, pumped out entirely before we headed to the shipyard (and filled the tank with water and pumped out several times, like we always used to do when pumping out), but what we should have done was head out in the Gulf one day and run loads of water both through the toilet to the holding tank and from the holding tank out the macerator. That would have been the smart way to do it.
I never said we were smart. While the tank was as empty as we could get it, both the hose from the toilet to the tank and the tank to the macerator and out the thru-hull were not. Disconnecting the toilet from the holding tank hose and working with a Shop-Vac to “contain the spill” was not a fun day for Annie at the shipyard, but damn if I didn’t get it done!


Victory!

Yes, I was that excited enough to dance with a toilet! It was a glorious day on Plaintiff’s Rest! To celebrate, I might need a little privacy … ; )

We’ll miss ya Jabsco … said no on ever!


The spot where the old toilet had been was stained a bit green from the rusting pump, but it cleaned up easily with the Magic Eraser. Thank you Mr. Clean!

This was the first time I could sit the new composting head in its resting place without the old head in the way and I was confident we were going to be able to make this work!


That was an exciting day, when I could finally set her in place and see that she fit! She fit! She fit! All of that worrying was done.
The Airhead was a little tall but not alarmingly so. I was excited to get the rest of the shitty stuff off the boat and continue with the install. Phillip and I spent a fun Saturday on the boat at the shipyard disconnecting the tank. Our holding tank (25 gallons) sits underneath, ironically, my side of the bed, on port under our vberth. Try to guess how many hoses were connected to the tank.

Five. Five stinky hoses: 1) intake from the head, 2) pump-out to the deck, 3) pump-out to the macerator, 4) overflow over the side of the boat, and 5) air ventilation up at the bow. Five hoses were pulled off the boat. And, I’ll spare you the details, but the one down to the thru-hull was the worst. Yuck. Nuff said. This here was a victorious moment on our boat!

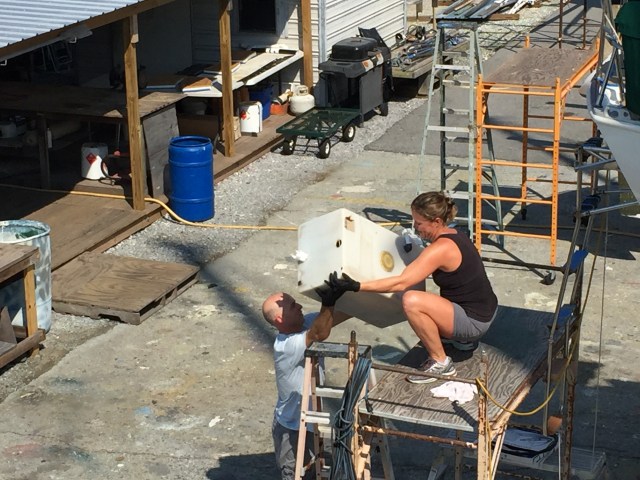

Another victory!
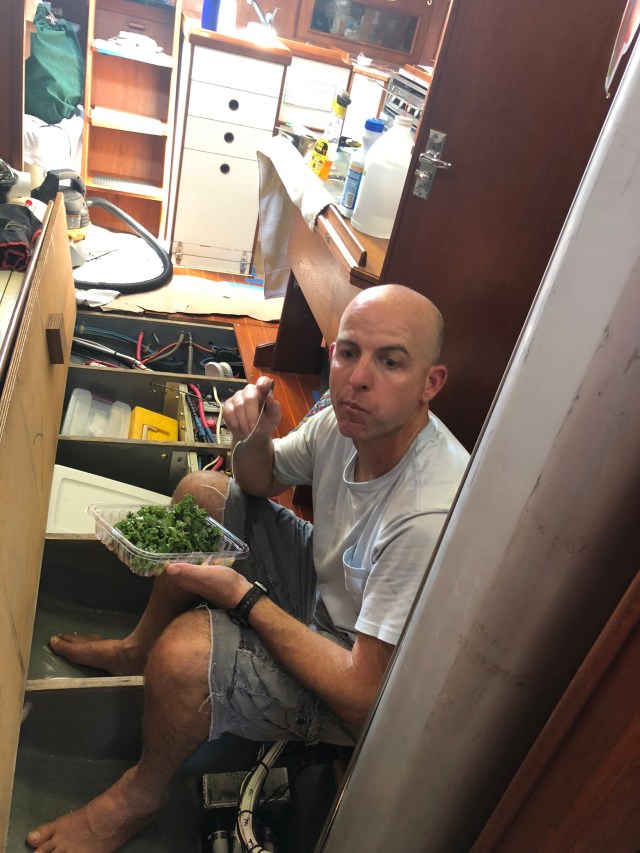
The holding tank is gone! That’s a giant Annie “Whoo! Hoo!” right there. We also took off the macerator that day and all of the hoses. Many of our days at the shipyard looked like this. You eat when you can and work from sun up to sun down.
Alright, with all the crappy stuff gone, it was time to get back to the install. Our first step was to fill the old holes on the floor with a coosa insert (where the hose to the pump came through) and 610 in the others, so we would have a solid leak-free base for our new head.


Happy worker there! Phillip knows I love 610’ing things.
For the floor, I knew we were going to have to build a floor underneath it that would extend out to support the urine bin. Geoff at Airhead and other composting head owners had advised the bin could not hang off on its own, it needs floor support. I used construction paper first, then cardboard to make a template for Shane with Perdido Sailor at the shipyard to cut a nice, bevelled piece out of starboard.


Shane did a really nice job cutting the starboard. Brandon liked to call it our “potty platform.” Ha!

It was a perfect fit. Although we knew we (well, I mean, I, Phillip is banned from caulking) was going to have to caulk the seams to prevent water from coming in beneath the floor piece, but it didn’t need caulk for security. That thing was a perfect fit.
The next step was positioning the head exactly how we wanted it and mounting the brackets.


Then we could pull the protective paper off of our starboard and see what a nice clean look Shane had created for us.

Once the toilet was mounted, our next step was ventilation. This turned out to be the trickiest part of the install for us. Like I said, primarily because of the way we chose to run it (or hide it, I should say) in the old ventilation channel that was for the propane water heater that used to be on our boat. We removed the water heater when we got the boat to meet insurance requirements, and we’re happy to heat our water in the kettle when we want a nice toasty below-decks spa experience! Our water heater used to reside in what we call the “shower caddy,” a rather large (and very convenient) storage locker in our stand-up shower, which is just aft of the head.


The heater was vented through a tube along the shower wall up and out the top of the boat through the deck in what I called a “stove pipe.” A not very pretty metal contraption, that Phillip and I have both cut many a toe-on over the years, so we were happy to see it go! You can see it in the photo here. Say “Hi!” to Hanna Banana. And, yes, it was such a hideous rust-bomb we had a cover made for it to both cover it up and keep the occasional water we knew was getting into it.
We decided to replace it with a solar fan on top, which looks much better, and this would actually double-up on the ventilation, with two fans pulling the air out.

Unfortunately, when we pulled the old stovepipe off and started digging around we found a significant amount of deck rot where it had been leaking. We knew it had, and that was the reason we had the cover made, but we didn’t know what damage it had already done. But c’est la vie. If you find rot, you have to fix it and stop the leak. It made this project more tedious, but it felt good to catch a problem on the boat and remedy it before it got worse. And, remember, I love 610’ing!

We put a tube and a half in there. The rot extended back a good 3-4 inches on one side, 1-2 on the others. There was a lot of digging! But we got it filled in nicely and flushed up the seam and we were ready to install our new solar fan. We also chose the solar fan because it creates a watertight seal to the deck. Another biggie in the composting head install is a guarantee water will not be able to get into the system through the ventilation. If water gets in, it messes up the composting and can lead to … I’ll just say “swampy” results. So be sure you have a watertight seal for your ventilation to the outside, or build in a “p-trap” shape into your hose to make sure water cannot get into the composting system.

Perfect!
As I mentioned, our install was likely a bit more tedious than others because we wanted to route the ventilation system through old channels (so we would cut as few new holes as possible) and hide as much of the hose and ventilation system as possible. In most installs, you will simply choose a place out the side of the hull or through the deck where you want the ventilation to run, cut a hole for your fan cover and run the tube to the fan. Voila. Airhead has some great install videos on their website here.

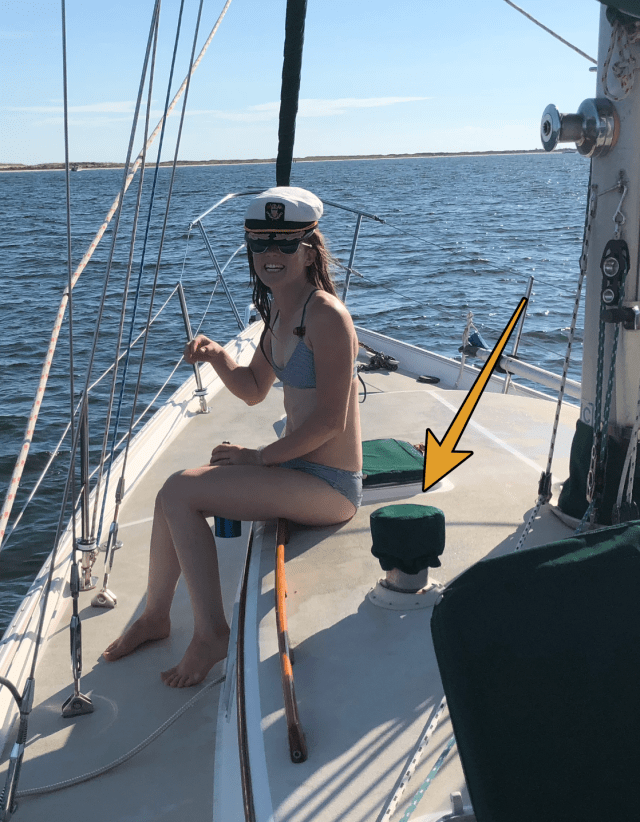
Notice the very visible hose going up. It will then be connected to a fan they have mounted on the ceiling of the head where they cut through the deck and mounted a cover for the fan to vent out.

In ours, we planned to run the vent hose from the composting head through the bulkhead to the shower stall, under the shower bench (to hide the hose into the shower caddy, where we hid the fan as well), and then run through a decorative piece on the wall that previously funneled out our propane exhaust and served as a shelf in the shower for soaps, shampoo (well, not for Phillip ; ), razors, etc. This was our plan for running the ventilation:


The hose will then run up to the fan in the shower caddy.
I’m pointing to where I planned to install the insect screen. Airhead is adamant about this. The screen is needed to keep insects out. If those little buggies smell your “stuff” you are venting overboard, they’re going to be very attracted and try to find any way possible into the system. If insects get into your composting unit, well … good luck compadre. I hear it’s very smelly and must be dumped immediately and start again. You must keep the insects out. You cut the hose in an area that is easy to access and screw the male part on (the hose is self-threading which is handy) and glue the female end on.


You then check this occasionally to make sure the insect screen remains clean and clear, allowing airflow freely out but no buggies in! This was our plan, now all we had to do was implement it. Attaching the vent hose to the bowl was no big deal. Just a little PVC glue and a flap to keep the hose in place and an o-ring to contain the air. But, I’ll warn you do NOT spill that blue and purple wonder glue. It stains instantly!


I brought Shane in to cut the hole through the wall because … well, I probably don’t need to explain that. It’s a beautiful wooden bulkhead and hole saws are not my thing. I always spin out of control and make an absolute mess (yes, even after I realized you have to have a pilot drill on it). Out of the entire install, this was only the second time we brought in an expert, mainly just to make sure, aesthetically, we got the result we wanted: for both the hole through the wall and the floor plate.


I then ran the hose through to the shower caddy and began the fan install.


I did that one all on my own and I was quite proud of it. We even ran the wire through the old propane hose (for chafe protection) back to the battery bank under our galley floor and I wired it up. We put a fuse on it (as it will likely run for extended periods of time when we leave the boat) as well as, what I call “plug-and-play” connectors. It was either these or a switch so we can turn the fan off at some point when we want to. Say, when the head is empty and we will be leaving the boat for a few months. These connectors are tucked away in the locker so an easier plug-and-play install, rather than a pretty switch, was fine with me. This is the pic I sent Phillip when I first turned on the fan.
“This blows!” said Shipyard Annie.

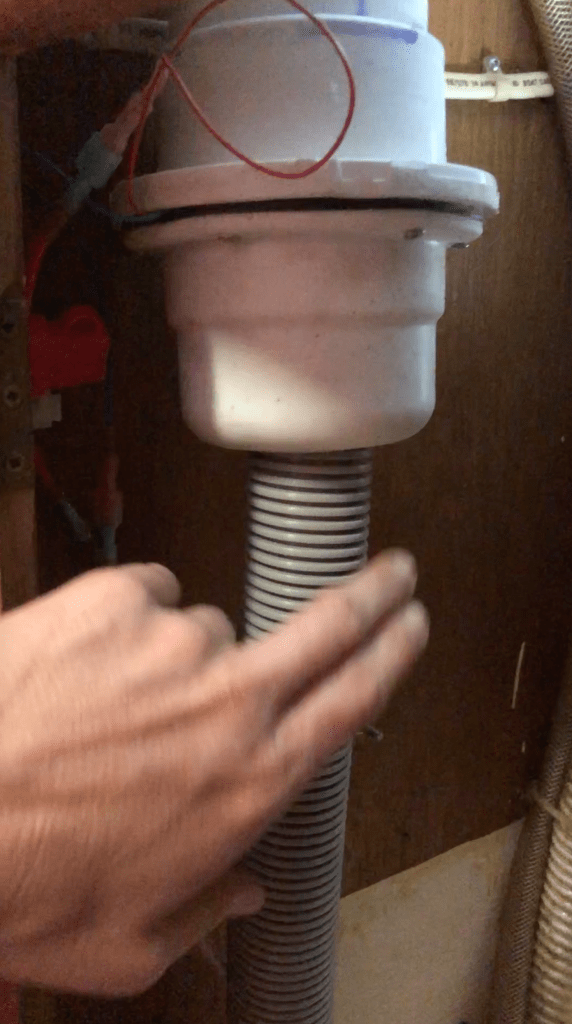
The biggest monster we faced with this project was this guy!

Frankenstein! Thankfully, we probably won’t see him again for decades (I hope) as he will be fully hidden under this piece.

But, getting him to fit and stay put was an uphill battle. We tugged and wrestled that thing for weeks before we finally found an odd rubber PVC fitting at Home Depot that we beveled at the top to match the angle of the ceiling.

Then Brandon finally gave us the good idea to secure the weight of the PVC with zip ties. But, making sure this beast stayed put and in the exact right position for our decorative cover I can assure was not easy and took many days of cursing and sweating in the head. I’m not kidding. That’s what lead to my “Can you see evidence of Annie?” in the head post!

But, we got her done! Here is a video of me walking through the complete install:
Once installed, the Airhead folks recommend you do the “toilet paper” test to make sure the fan is in fact pulling air out of the system and overboard.

Check! It was really cool to finally finish the project and have the new head installed. We could tell instantly (even before using it) that the simplicity of it, omitting so many other systems (a manual pump, a macerator, a Y-valve, tanks, hoses, clogging flaps, etc.), was very appealing. It’s just one self-contained unit that vents overboard. That is all. Annnnd, it allowed me to clean and paint all of those lockers that used to be smelly and avoided at all costs. This is where our holding tank hose used to run forward to the vberth and where our Y-valve for pump out overboard or through the macerator was. Where this once was stinky and shunned, it’s now white and fresh as a spring daisy!


This locker that I’m painting (behind the head where we keep toiletries) was where the old overflow for the holding tank ran. We actually decided to change our sump box discharge from down the head sink to this fitting so it can now get pumped overboard and allow us to now close all sea-cocks (including the one for the head sink) when we leave the boat for extended periods. Again, this proved to be a better use of old channels leftover from obsolete systems. Win-win!
This was where the holding tank used to be. It’s quite a large locker. And where the smell used to emanate from this area anytime you simply lifted the vberth mattress, it’s now odor-free and slapped with two fresh coats of Bilgekote. I love Bilgekote.

We built a cover for the wash-down pump in there in case things we stow in that locker go to knocking about … because that never happens on a boat, right?


We’re excited to see what we can fit in there. Maybe the genoa? If not Stormy McDaniels, our storm sail, for sure. Maybe all of our paper towels and toilet paper? And, at the very least, a shit-ton (no pun intended) of coco bricks for our many seasons in the tropics! But now we will no longer be traveling with a turd tank and we’ll never have to pump out again. We’re stoked!
I hope you all have enjoyed the post about our swap to a composting head. We’ve only actually used it a couple of weekends on the boat but have been very pleased with the results so far. I will post an update as we get about six months or so in. But feel free to shoot many any questions you may have if you are considering making the swap, too.

And, for those who have already made the swap, inquiring minds want to know: What do you now keep in your now fresh and fragrant holding tank locker? Do tell!
Knowing how urine that’s been sitting around for a little while smells how does the holding tank for that smell when you have to go and empty it? I’ve seen quite a bit on these composting heads and quite frankly the thought of emptying one grossed me out. How is it in actual practice?
As always great post.
Hi Captain Annie,
Most guests will refrain from use because it freaks them out. Yippee!
Well now you will no more crew.Oh you did say guests same thing.
I wonder why nobody puts a small bilge pump in the urine tank and just pump overboard ? A comprenhesive video cheers Warren
Hi Annie,
Wow great post!
Our holding tank was under a shelf under the galley sink (Niagara Mk 1). So not that accessible. We’re going to figure out some access like a trapdoor but still not sure what to use the space for.
Carolyn Shearlock’s The Boat Galley has been my go-to for info on composting heads and medium. She recommends only 1 cup (yes, 1 cup) of water per block of coir. I put the coir and water in a black garbage bag and put it in the sun for the day which helps make the breaking up of chunks easier. The coir works well. I’ve also used pine shavings (meh) and pine pellets (kinda like these). I’m going to also try aspen shavings which is what Sandy at C-Head likes best currently.
It’s freakin fantastic to not have the stress of managing pumpouts and our boat smells ah-mazing! Never going back.
P.S. To manage the delightful scent of urine sitting around for 24 hours, I dissolve a 1/4 of a toilet disinfecting tab (no bleach) in a gallon of water and squirt some in after every deposit. It helps a lot.
Good luck and enjoy!
Stacey
Stacey! I’m sorry for the late reply to this. WordPress for some reason thought you were spam. Wow, only one cup? Hmmph. I’m not sure about that, but maybe need to try it next time to compare the results. Thank you, thank you for the tip about the disinfecting tab. I’m going to look for a few of those asap. Thank you! That was not the most pleasant smell, even just sitting in the bin, or when dumping. Not terrible, but still it would be nice to do away with that odor as well. Thank you so much for that! (And, I have to say I find it funny you say “enjoy” that new head. Heads are rather enjoyable when they don’t entirely stink! : )
Hi Annie, just wondering what your thoughts are regarding the composting toilet now that you had it for over a year? Thanks!
Hey there! We love it. It’s such a simple, reliable system (with far less hoses and components), not to mention all the space we freed up by removing the holding tank. P. U. It’s a great system for us, very eco-friendly and doesn’t require us to dock up just to pump out. The only (slight) complaint I have is the frequent dumping of the urine bin. We have to do it probably 3-4 times a day (maybe we drink a lot? ha!) but I just throw it down the head sink now with squirts of vinegar behind. Not a big deal, but I might install a small pump for that down the road. Otherwise, we love it. It was a super upgrade for the boat. There is no head smell now at all.