This is it! The post you all have been waiting for. Now that the stringers under our engine are repaired, it was time to get Westie back in place and aligned so we could tackle one of the projects we were most excited about this year: PAINTING THE ENGINE!
Phillip and I have had Westerbeke-red visions dancing in our head for weeks. The thought of having a completely leak-free (or even just less-leaky-than-before) engine that would be bright, shiny red, ready to point the finger vigorously and immediately at any leak really pops our corn. Phillip and I were both super excited to get Westie assembled, all cleaned up, and ready for a few layers of sweet Westie red. And, as many of you have asked us about this process (this was probably the most commented-on post from our shipyard Facebook photos), we wanted to share with you all the process in case any of you are thinking of doing the same. To be honest, this paint job, while probably one of the most visibly-rewarding of our projects this summer, was by far one of the easiest.
First, let’s talk a little about why we wanted to re-paint the engine. While a fresh coat of paint would, as I mentioned above, greatly enhance our ability to spot and troubleshoot new leaks from the engine, I later learned this was not the primary goal. What were we really trying to accomplish in cleaning and painting our engine?
Rust prevention.
As Brandon with Perdido Sailor explained, the number one thing to really rob years of life from your engine is corrosion and decay from rust. Phillip and I were definitely seeing evidence of that in the layers of metal that could easily flake off of our engine, primarily on the backside where it is the greasiest and near the water pump where it suffers the most rust corrosion. This part on our engine, the cradle support on the back, had probably suffered the worst of the rust, so Brandon devised a good plan for us to take the rust head-on and prevent further decay.
![]()
Let’s talk a little about this product: POR 15 Industrial Rust Preventer

It’s a three-step process for cleaning metal, prepping it, then painting a rust-preventative coating on it, which chemically bonds to the metal, before the final paint. We special-ordered it from Amazon so we would receive it in time to apply to the cradle before it was time to re-assemble the engine.

That was the plan anyway. Phillip followed the instructions to a “T” using the cleaner, then the prep, then the POR paint, followed by Westie red. We also woke early and were at the shipyard before 6:00 a.m. that day to apply the POR before the humidity rose in the heat of the day. Living in humid, muggy Florida, this was one downside of the product:
POR-15 is cured and strengthened by exposure to moisture and will dry faster under extreme humidity, but moderate to dry atmospheric conditions are most desirable when applying this product, because extreme humidity may cause an immediate surface cure, trapping carbon dioxide gas below the surface. When this happens, bubbling may occur. Extreme humidity at the time of application may also interfere with proper adhesion of the POR-15 coating to metal because it’s almost impossible to keep metal dry under such conditions.
Yep, you read that right. If it’s applied in too humid of an environment, bubbling can occur. For us, bubbling certainly did occur.

Just a few scrapes with Brandon’s knife and both the red and the POR were flaking off back to pure metal.

We’ll have to call this attempt an epic fail.

But, we’re determined sailors. With reassembly of the engine scheduled for the next day, Shipyard Annie was sent in to try and remedy the damage to keep us on track. It was either spend the day stripping all of the paint off of this beast manually (including the areas of mega-bonded POR that did cure properly) or—Option B—whip out this toxic devilish serum for a chemical strip:

Have any of you ever used this product? I mean damn! It will peel the paint off your nails. That stuff was super intense. But, it was our quickest option. Phillip picked up a similar brand from the auto parts store and Annie set to it.

The minute I started slathering it onto our cradle, the paint started hissing and bubbling in violent (albeit futile) revolt!

It literally took me 12 coats of this acid with scraping in between to finally get the POR to let go. Everyone at the shipyard said it looked like a murder scene!

It was also a little painful too. Even through gloves, after multiple applications, the toxic aircraft paint remover began to make my hands feel cold at first, then they started in with a painful tingle. I was honestly worried I might be unknowingly inflicting permanent nerve damage on myself. I checked with the guys at the yard to be sure and they said it’s painful but temporary. So, my murdering continued and finally we were back to bare clean metal for another attempt at the POR.

Brandon helped supervise this time and we applied it initially in his air-conditioned, somewhat-enclosed shop area. (He has what I call “butcher freezer” plastic flaps that hang down, keeping the room cool for the guys but easy to come and go with tools, paints, whatever in your hands.)

Even with Brandon helping with the application we were still getting a little bubbling at the shipyard, so I took the pieces home to our fully-air-conditioned apartment for the final coat and the second time around resulted in a solid cure of the POR under the Westerbeke red.

That piece was easily the hardest part of this job. After the cradle was in place, and the engine reassembled (with a successful alignment check by Brandon and Shane), Phillip and I were finally given the go-ahead to paint. Say it with me: “Whoo Westie Hoo!”
Our first step was to clean the engine thoroughly with Zep. That is some awesome de-greasing stuff. Perfect for this situation. Simply spraying Zep on and rinsing alone took off the majority of our oil and grease for painting. This is the difference in the engine from merely dirty to clean.


We then scraped off any paint that was ready to jump ship. Our goal was to get as much bare metal as we could exposed so we could start fresh with primer coats there before the final red coat.
Our next step was prep. Shane with Perdido Sailor gave us a good tip to cover all of the hoses and wires and other fittings on the engine that we did not want painted with aluminum foil. It was nice because it was easy to work with and would wrap around pipes and fixtures and (for the most part) just hold itself there, which made the prep work much quicker, albeit still a good three hours. We were also careful to tape and cover caps, dipsticks, the throttle and shifter cables, the intake, etc. When we were done, we had an odd-looking foil monster in the engine room.


Then it was time to paint. A follower on Facebook captioned this photo Boat Project Magazine’s August Centerfold. I’ll take that! : )

On Brandon’s recommendation, we started with green zinc chromate on all areas that were bare metal (which were a good bit!). The fumes were pretty intense in the engine room so we donned a mask and goggles. A follower later recommended I probably should have thrown on a Tyvek suit for skin protection, which would probably have been much smarter. We’re told the chemicals in that zinc chromate are pretty harsh. If I start growing a third eyeball, I’ll let you all know. But, you can see the green areas in the photos below.
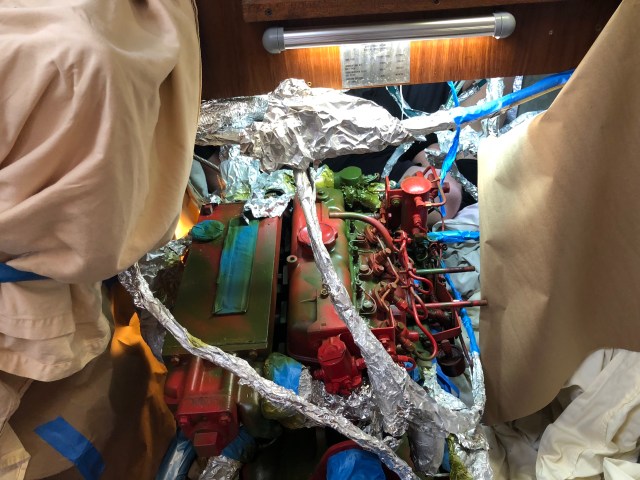

Outside near the Perdido Sailor shop, Phillip was also painting the heat exchanger before we put it back on as well.

The next step was a grey primer over the green zinc.


The fumes were pretty intense, particularly down in the engine room. But with a mask and goggles, the job wasn’t too bad.

Finally everything was ready for our favorite shade of red. And, I can’t tell you how many times this awesome scene from Kinky Boots was repeated at the yard when we were getting ready to start spraying the Westie red! I mean “Reeeeeeddddd” (with a hiss).

“Red is the color of sex! And fear. And danger. And signs that say “Do not enter.”
But, all of our signs say “Yes, indeed, do paint!” Let the Westie Red fly!

Now you see grey. Now you don’t!

Yeah baby! We were tickled red to pull the foil and tapes and drapes all finally away from the engine and admire her new coat. I dare say Westerbeke red and Bilgekote grey are my new favorite color-combo.


Westie sure does look good! Not only will we now be able to easily spot and trace all leaks of oil, water, or coolant, our engine also now has been given a few more years of rust-free health that we hope to continue. Brandon recommended after we run the engine for 5-6 hours once we’re back in the water, which will give it time to “burn the paint off,” that we then spray the whole engine down generously with anti-corrosion to continue with our rust-prevention plan. It will feel good to know we’re taking steps to proactively fight the rust down there.
But, one word on our prep, in case any of you are planning to paint your engines too. We did not prep near enough. While we did cover everything in the engine room that we did not want to be forever converted to Westerbeke red, and we did drape what I felt like were an exorbitant amount of sheets around the engine area, what we failed to do was successfully contain the red dust that fumigated from our engine room while we were painting, the entirety of which traveled all over the boat. Read that again.
All. Over. The. Boat.
Look at these photos here. I have circled the areas that are coated with a pink dust.


When we finally pulled all of the sheets and looked around, the entire boat, going forward to the bow, had a fine layer of pink dust on it. Thankfully—knock on a freaking jar of acetone—that stuff dries so quickly that by the time it was airborne and ready to drop, it was merely a powder that could be wiped off of the floors and acetoned off of the gelcoat.
Meaning, we did not permanently stain our entire boat pink for good. But, we should have done a much better job of somehow “caging” the entirety of the air around the engine room. Perhaps with more sheets taped over and above, or plastic drop cloths taped all around. I’m just pontificating here because we sure did not contain it enough. We probably should have had better ventilation to pull the “red air” directly out of the boat through a lazarette and draped and taped that exit hole as well. Thankfully, while we were able to remove the red by wiping the wooden floors with a wet rag and all of the gelcoat inside the entire boat with acetone, this did not make it an easy or quick job.
The fans, in particular, took a while to clean because they pulled so much “red air” through them.


You can see in this photo the red sheen on the gelcoat. Each section like this—particularly the sections that were textured like nonskid—took about 15 minutes to wipe clean. We turned twenty rags red just from wiping our boat down after our poor prep job for the engine paint.

The good news is, we had planned to wipe her down regardless—bow to stern—as we always do when we have all of the soft goods out. So, this wasn’t too much of a setback for us, but definitely an extra day of cleaning we added to our own list by not covering as much as we should have for the engine paint job. But, lesson learned for sure.
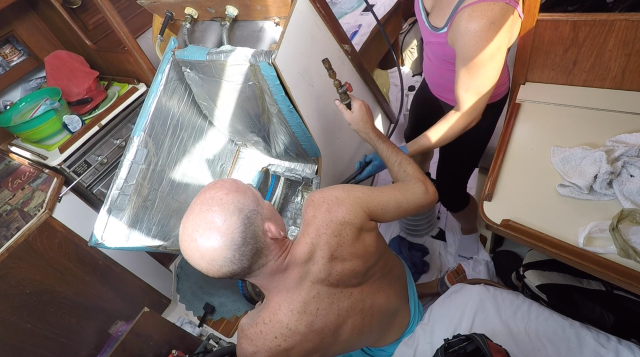
Our engine paint project, however, did not stop with painting our engine. We had planned from the start to also add bright LED lights in the engine room after we completed the painting and replace our old engine room insulation, for several reasons. One, our old insulation was all rag-tag, duct-taped-on in multiple colors and always falling apart, crumbling, and making a nasty black mess every time we accessed the engine.

We primarily wanted to remove it because it was filthy. And, two, we were sure in that crumbling condition it was not performing at its optimal heat-and-sound buffer capabilities. We also wanted to install engine room lights so we would have excellent visibility in the engine room without having to hold flashlights in our teeth. (Okay only Annie does that, not Phillip, but I would like to break the habit.) The entire goal with this mini-engine overhaul was to make our engine run better, cleaner, and better enable us to work on her, troubleshoot, spot leaks, and repair issues underway. So, cue the lights!
Phillip installed one on the front of this bulkhead over the engine, as well as on the back.


We also installed a third, larger one, that runs bow to stern, rather than athwartship, in the engine room itself behind the engine. Phillip was sure to install them all in a way that the “on” switch can be reached from our easiest access point, the front of the engine in the galley. I can’t show you the big one in the engine room, yet, because it will ruin the NASA insulation reveal. Savor the intrigue!
For the insulation, we ordered four boxes of big thick rolls of Soundown insulation from the internet along with their sealing tape, and this became an exclusive Annie project.
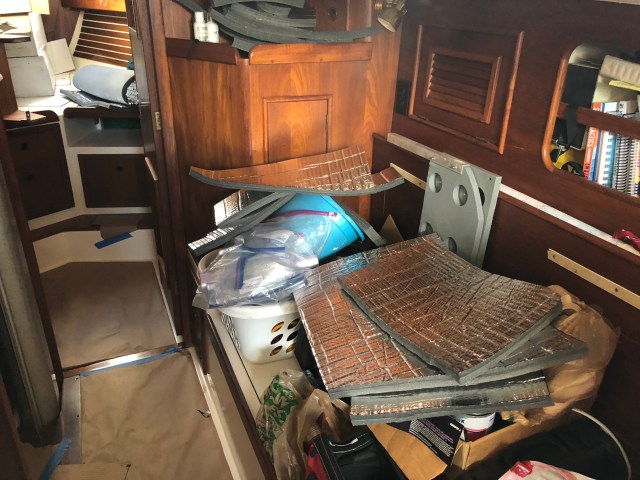
While some of the pieces were easy to template, others were not. These pieces under the sink were rather large, and mostly square, so I started there, with construction paper templates first, then cutting pieces out of the insulation.


This monster, though … I can’t tell you how many days at the shipyard I found (mostly legitimate) reasons to avoid starting on this wall. With all the wires and mounts and stuff, it seemed impossible to template. It was hard enough to rip the old insulation out of there, much less make a precise pattern to put new insulation in.

But, a project will never get done if you never start it. So, I bucked up one morning and set to it, first with construction paper taped together to (in hopes) make the entire piece out of one template. This was my awkward masterpiece.

I had no clue if it was actually going to squeeze in behind the small gap in the gadgets and wires I had created to work construction paper through, but Shane and I gave it a shot. His words as it slid into perfect position: “I’m going to lose my damn job!” : ) That was a really cool feeling for me. Never had I done that before, but I’m confident I can now lay down engine insulation with the best of them.

But, that was just the initial “mounting” (I will call it) of the insulation to the bulkhead with the 3M 77 adhesive spray. The tedious and very time consuming “seaming” of the insulation is what had me down in there for hours upon hours. Shane told us the trick to keeping this insulation in good shape is to prevent any water entry into the foam. You do this by tediously taping every exposed foam seam. This often takes layer upon layer of tape (much link shingles) to get the tape to push the foam down, wrap, and hold. Let’s just say I went through a lot of tape. We also secured the insulation with screws and fender washers, and I was tickled platinum pink with the results. Our engine room now looks like a NASA launch pad.


And, what do you see there? Our new 21” LED light in the engine room. Lighting up the insulation like a Christmas promenade. It is quite the dazzling display down there now. Westie feels like a show horse at the County Fair. I feel bad for any drop of oil that even thinks about inkling out of our engine. Like a prisoner trying to escape from Alcatraz, we’ll shine a spotlight on it so fast he’ll run back to where he came from and never come out again. There will be no leaks from this engine people. Nada.
Hope you all enjoyed the engine projects. Guess what’s next! Our swap to a composting Airhead. That became a bit more of a puzzling project than we had initially anticipated. Trust me, all of this weirdness will make sense soon!


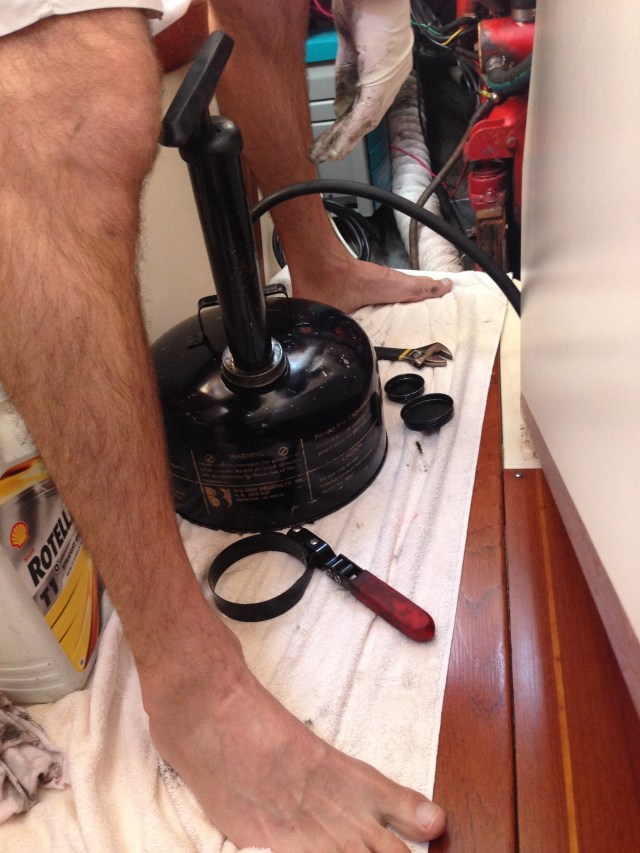
What do you think I’m installing here? Give it a guess! And stay tuned!