

Or maybe I should say: “My Jerries are strapped. I’m ready to go. Standing here outside your … dorade-oh.” I’m great with lyrics. Ahoy crew! Phillip and I are getting excited to shove off soon for the Bahamas again. We love that area! And, while we fell in love with the Abacos last time, we want to head back to do some more exploring in the Exumas this time, and the weather is looking good for a shove-off tomorrow morning at daybreak! We don’t know exactly where we’re going or how long we’ll stay, and we love it that way. I can tell you this: Phillip and I did not pack a schedule on the boat this time! But, we did pack a lot of other stuff and made some changes this year on how we stock and prep the boat for offshore voyaging and island life that I thought would be helpful to share with you all.
If you can believe it, this was our short list:

And, THIS is what your boat looks like in prep mode. Fun stuff. Everything is torn apart, lockers emptied, tools everywhere finishing up last minute projects. It’s a hot mess, but totally worth it.

The good news: One thing Phillip and I have noticed over the years as we cruise half of the year and spend the rest in Pensacola—often on the hard for a few weeks or more during that time with Brandon at Perdido Sailor making repairs or upgrades to the boat—we’re getting very good at both stripping the boat down for the yard, then stocking her back up for cruising and offshore sailing. The more you do it, it starts to become a well-oiled routine and you get better at deciding where and how to stow things, and how to best disassemble and remove things. I’m not ashamed to say: It feels pretty f*cking fabulous to have your boat dialed in. There’s six years’ worth of sweat and work in that accomplishment that we’re immensely proud of. So, how do we prep our boat for offshore sailing and island cruising? Let’s dive right in!
First up, the new stuff:
Purchasing and Packing Coco Bricks for Our New Composting Head
As many of you know, Phillip and I swapped from our manual pump head to an AirHead composting head when we were in the shipyard in 2018.

I wrote a detailed blog post about it, as well as a video showing the install and shared extensively in both of those pieces how thrilled we are with the decision. It is a much simpler, more eco-friendly system. It takes up far less space and smells a thousand times better. It also looks better and makes our lives simpler in so many ways. This voyage to the Bahamas will give us a true experience of cruising with a composting head both offshore and as full-time live-aboards, so we are looking forward to that.
But, this was a “new” item for us to pack for this year, as we needed bricks and paper filters. We were able to purchase the bricks for a very reasonable price off of Amazon. Here is a link. They’re about $3.50 a piece and each bricks lasts 3-4 weeks. So, we ordered 12 from Amazon, and I am pleased to say they ALL packed nicely around our trash can in the lower section of the cabinet under the head sink. This area:

They even prop the trash can up better so it does not topple around and makes throwing those little goodies away even easier. We ordered the coffee filters (although I love that Airhead calls them “paper carriers” – that’s classy) from Airhead as well. I think three packs of 50 was like $12, no sweat. We also swapped to a plastic trash can down there as our previous metal one was rusting and making a mess. You know how I feel about messes … No, Sir! Not on Plaintiff’s Rest!
With our those stored, we are good to go with the head for, gosh, 8-9 months of cruising, if not more, depending on how much time we spend on the boat consistently using the composting head. But, man, isn’t that a great feeling? Never having to go to the fuel dock again just to pump out, and never having to pump out again, ever. I’ll take it!
Packing Out the Turd Tank Locker
Now, Phillip and I had the very awesome problem of what to store in the locker that once housed our stinky, sloshing turd tank, which is now super clean, smelling of BilgeKote and baby’s breath. I believe it’s baby’s breath. Something sweet and inviting. See? I hopped right in!

I was surprised to see—once the holding tank was out—how BIG that space really is. There was a shelf built in to help hold the weight of our former 25-gallon holding tank. I’m kneeling on it in the photo above. But, the area underneath that shelf is about half the size of the area you see me scrunched up in here. So, a half-Annie can fit! : )
Phillip and I haven’t even filled that lower area with anything yet. We haven’t had the need. Each year, we find or create more storage space on the boat (and we also learn to pack smarter and lighter) and so our storage needs seem to always be met, well, exceeded is more like it. Now, that may change when we’re getting ready to cross an ocean, but I’m fully confident when that time comes, all of these half-full, empty, and/or yet discovered areas in our boat will easily accommodate our ocean-crossing needs.
This area, here, however, where I’m curled up and where the holding tank used to be, is pleasantly massive! So big, we were a bit stumped at first as to what exactly to put in it. Hence, its inclusion on our packing list. What goes there? we pondered. As Phillip and I are always trying to counter-balance more weight in the lower and aft parts of the boat—to offset our 200 pounds of chain in the bow—we planned to stock lighter goods here, and I was shocked to see the following fit in this locker, with room to spare:
Our storm sail (aptly named Stormy McDaniels : )
3 (yes three!) 12-packs of toilet paper (yes, 36 rolls is extreme overkill, but we have the space for it and … that’s not something we really want to risk running out of)
6 rolls of paper towels
2 blue rolls of shop towels
And, a beach-sized bag of some of our more bulky epoxy project pieces (bins to mix epoxy, paint stirrers, random containers, rubber gloves, etc.)
All right there. And, in the lockers further forward of this one under the vberth we were able to stow all of our extra lines (about 12-14 I’d say … many of them I have no clue what they could or should be used to do, but hey, we got ‘em!), the ShopVac, spare sheets, work towels, an extra set of dock lines (in case we have to tie off for a big storm), as well as ALL of our kite-surfing gear: (3 kites, harnesses, bars and a pump). All of that is right here under my rump!

You see what I mean? It’s like our boat can’t get enough! Whatever we dump in she seems to swallow it whole and shut the lid. Got it? Anything else? she asks. Love that gal. And, because we installed a watertight floor in the anchor chain locker during our extensive stint on the hard in 2016 (check out our Shipyard Video “No More Water in the Bilge!”) and ran a hose carrying the anchor chain water to our sump box in the center bilge, every locker forward of the center bilge is a DRY locker.

Bone dry. I’ll never regret that tedious, but well-worth-it project.
What else was new?
New Storage Cubbies in the Bilge
So, this was fun. During our voyage to Cuba in 2016 and to the Bahamas in 2017, Phillip and I began utilizing these spaces under the main floorboard in our saloon.

You can see our batteries are mounted here (which provides great access for their periodic water-filling) and the frame for the batteries provided two nice bilge cubbies on starboard where we stow bigger, less frequently used tools and other supplies. Utilizing those bins effectively on our Bahamas Voyage in 2017 inspired me to create two more further forward. I used the Brandon cardboard-cutout method (patent pending) to create templates (because boats are never square or perfect) and we then cut the necessary pieces out of starboard (conveniently from a piece that was leftover from our “potty platform” Brandon called it—the big square piece we used to make the platform under our composting head. So, it turned out to be a great re-use of readily available resources.


Isn’t it funny how you carry little leftovers and things along like that because someday you just might need them. You may be wrong, and they may seem “in the way” many, many times, but you know (you just know!) the minute you throw it out, you’ll need it. Thankfully, we held onto the remainder of our “potty platform” it seemed for this very reason. These two new cubbies served us perfectly by housing large and small bottles of water (we bring a good bit of drinking water when we cruise) as well as three bags of wine and 3 mini 12-packs of sodas.
Stowing the Goods!
Phillip and I have found so many new places to pack food and drinks these past few years on our boat. And, once we discovered them, I—of course!—the next time we hauled out, dumped them and slathered them with Bilgekote (I love Bilgekote : ) so they are clean and smell amazing. Surprisingly, we store a huge amount of food around our water tank on the port side. There is also a cubby aft of the water tank that usually houses ALL of our canned goods, if not other things like sodas, coffee, rice, and any kind of pantry item.


This also helps balance out all the weight of the diesel tank on starboard. All of our soft goods like toilet paper, paper towels, towels, clothes, etc., we try to stow forward and higher to help the boat maintain its balance.
Our cubbies in the after berth also swallow a lot of wine (7 bags this time) along with waters and other goods. As you can see, we like to get as much of the heavy weight low and aft to offset the Bohemian weight of our 200 foot chain in the bow. For anyone curious, we probably packed 10 boxes of wine and 15 bottles, I believe, on top of the general booze. I mean, that’s stuff’s important.


#thewineispacked #nowecango
ENGINE, SPARES, AND SAFETY GEAR CHECK
We also do the following any time we are preparing to head offshore. It’s been comforting to refine this list over the years and get better and better at performing these chores. Between you and me, I think our boat really appreciates it, and sees the love that goes into getting her ready to take us to magical places:


- Change the oil in the engine (if it’s time – 50 hours)
- Check/change the primary fuel filter if needed
- Review and re-stock the following boat supplies as needed:
- Engine spares (fuel filters, gaskets, zincs, etc.)
- Fluids (oil, coolant, distilled water, transmission fluid, hydraulic fluid, etc.)
- Epoxy kit
- Check and update our pfds if necessary
- Check all of our handheld devices for updates/batteries, etc.
- Check our B&G (primary) and Garmin (secondary) chartplotters for updates, etc.
- Check and update, if necessary, our fire extinguishers
- Check and update, if necessary our smoke and carbon monoxide alarms
- Check and update, if necessary, all of our ditch bag contents
- Make sure we have a handful of flashlights that actually work (and plenty of batteries)
- Check and replenish our emergency food and water stores in the ditch bag
- Check and replenish our first aid kit (never fail that means more band-aids, our boat often bites!)
- Update and activate the Delorme and make sure it’s tracking and messaging without issue
- Send a float plan to designated friends back home with vital USCG and other info
I wrote a much more extensive article about the entirety of spares we pack on the boat if you are interested here.


Phillip and I also carry a spare alternator and a spare raw water pump aboard. While we do not have one now, in the future, Phillip and I really want to find a replacement auto-pilot for ours that we can just drop in if necessary and carry that aboard when we start to do more extensive (think ocean-crossing) offshore sailing. Experiencing what we did with Yannick on our first Atlantic-crossing, where we lost the auto-pilot in the middle of the ocean, but thankfully just a few days from the Azores, it would have been nice to have a back-up auto-pilot ready to drop in and continue sailing.
RIGGING THE BOAT FOR OFFSHORE SAILING
Drop Our 135 Genoa for Our 90% Jib
When we get ready to go offshore, Phillip and I drop our 135 genoa (“Genny”) to fly our 90% offshore jib (“Wendy”) as we cross the Gulf, and likely as we sail around the Keys and the Bahamas, too. After sailing several seasons with Wendy on the forestay, Phillip and I have found we’re usually more comfortable with a smaller sail up there and the option to throw up the spinnaker (“Spinny”) when the winds get light enough for us. Having the 135, the 90%, our 35% storm sail, and our asymmetrical spinnaker, Phillip and I finally feel like we’ve got a diverse and functional sail plan for our boat dialed in.

Install the Inner Forestay
We also hoist Captain Annie up the mast every time we prepare to go offshore sailing so I can install our inner forestay in case we need it if we get into some gnarly stuff out there. I did a video on how to rig your boat for heavy weathera while back which shows this process in more detail if you’re interested. When we’re coastal cruising, Phillip and I generally keep that stay down to preserve it. And … Annie loves a nice, sunny mast hoist. It makes for great mast selfies! (Yes, that’s a thing.)


Stowing the Dinghy
We also pack down our dinghy and store it completely below decks with the outboard firmly fastened on the stern rail. Any of my followers who have read Salt of a Sailor or Sometimes You Need a Hacksaw can understand why. Phillip and I will never travel offshore with a dinghy on the davits. That is just our preference after an expensive “adventure” during our first voyage where we lost the dinghy (and could have lost the stern rail, which could have caused us to lose much, much more). Going forward, our dinghy, Dicta, always goes below decks for offshore voyages. Although the assembly does require a bit of a downward dog, it’s well worth it to have nice clean decks for lounging topside on calm sailing days, and more visibility of the horizon and passing ships. #boatyoga


OTHER ODDS AND ENDS
Replaced Worn/Aging Reef and Boom Lines
While all of the above tasks were done specifically to prepare the boat for cruising to the Bahamas, we also did a number of things that simply needed to be done to ensure our baby is in the best offshore shape for our jump across the Gulf. It can get gnarly out there. Phillip and I have told fellow sailors many times that the worst “stuff” we’ve seen was in the Gulf, not on either of our Atlantic Ocean crossings. So, our Gulf-crossing prep included replacing our reef one at the clew for the main sail, which runs through our boom. We also had an outhaul that was sticking so we had the guys at Zern Rigging look into that as well while the boom was off. And, we replaced our outhaul line as well which was looking tired.


Rebuilt the Furling Drum
The Zern guys also came out to the dock to remove our furling drum so they could rebuild it and replace the bearings. That thing was squealing out like a pig at the fair when we were turning it. DJ at Zern Rigging advised changing out the bearings and re-building our swivel shackle for the head sail.


A New Reef Line Tie Method
In re-attaching our reefing lines, we implemented a little trick Phillip had learned while listening to one of Andy Schell’s podcasts at www.59-north.com. We love that guy. He and Mia are so inspiring. Andy had mentioned on one of his podcasts, which Phillip listened to during our recent Atlantic-crossing, that he and Mia—while sailing under a reefed main—were not pleased with how the bowline that attached the reef at the clew to the boom seemed to prevent them from being able to truly cinch the sail all the way down to the boom for safer, flatter reef. So, Andy and Mia devised a little wrap-around trick, wrapping an extra loop around the boom and tying the bowline as part of the wrap-around to allow the reef at the clew to really cinch the main sail all the way down to the boom. We tied our reef lines at the clew to the boom using this method and we’re excited to see how this trick performs in heavy winds, if we find ourselves in any (because that it always totally possible!). “If it’s going to happen, it’s going to happen out there.”


Man that is some tobaggan hair there! Way to go Annie.
Replaced Our Jib Sheet Blocks
We replaced the jib blocks for our head sail which are mounted on the outside of the cockpit on both starboard and port that feed the headsail sheet to our Monster Winches (I call them) in the cockpit. They are truly the work horses of the boat, which is why we check and service them often. While our winches are strong as ox (oxen? oxi?), our old “dinky” blocks that guided the sheet to them were half broke, missing some bearings, and (more likely than not) causing extra tension on our jib sheets. As you all know, when you’ve got the genny full, that sheet’s got enough tension already. So, Phillip and I went with some new, far more substantial, and far prettier (I love stainless … before it rusts! : ) jib blocks.
This job involved drilling the stainless plates, which was a bit of a chore, accidentally busting the blocks open and losing half the bearings to the drink, as well as having to have custom starboard risers made to create a fair lead. It was one of those projects that begets projects that beget projects, if you know what I mean. But, we got it done and we know this will help further reinforce the strength of our head sail when we’re sailing this year. And, they just look fabulous! While we do want to do like to focus our projects on improving performance and functionality, there’s never any harm in just making her prettier. I honestly think she appreciates it and sails better for it.


Replaced Our Old (Ugly!) Dorade
Speaking of making her prettier … we got a new dorade! This was just a fun thing to do, something we’ve wanted to do for years, and it made for a fun surprise birthday gift for Phillip that Brandon got to get in on. Brandon conspired with me to get a new stainless steel ordered up in secret and we surprised Phillip with it. As you can see our old plastic one was all splotchedy and played out. Shane, at Perdido Sailor, asked me if that was the “moldy thing” mounted on our deck, and I had to say “Yes, yes, Shane. It looked like it was covered in mold.” Our old dorade just really aged the boat, and I knew a shiny stainless one would help perk things up. As projects beget projects, of course the new dorade would not fit the old plexiglass cover, so I had to have a new one mocked up to fully round out Phillip’s surprise, but it was totally worth it. “Crackeldy purple” is not a color our boat really adores. Didn’t this turn out great??


Gave the Outboard Some Love
If any of you cruisers out there have an outboard that starts all the time and never gives you trouble, please tell me what kind you have? Or what magic kind of hoodoo outboard voodoo you’re doing that makes that happen. Is it some kind of dinghy dance before you pull the cord? While I love our 3.5 hp Tohatsu, he’s just so darn finicky sometimes. And, in case you were wondering his name is “Sue” as in A Boy Named Sue. Fitting, no? Maybe he acts up because he doesn’t like the name. In any event, during our past few weekends on the hook at McRee he was giving us trouble, so we tore him apart to clean out his carburetor. Unfortunately, that thing looked immaculate so we’re not sure that was the problem. Perhaps a little water or gunk in the fuel or fuel tank. Whatever the real reason, he seemed to just enjoy the love and starting running great after that. We’re just winging it till the next time he wants some love. Aren’t outboards fun?


Stowed Our Spare CQR
Many of you may have seen my recent post on our decision to upgrade our our 35-lb CQR (lovingly named the “Rust Bomb”) for a 37-lb Sarca Excel.

I posted a detailed blog article about our research and decision if you want to know more about the reasoning behind our choice, but in that decision, we knew we wanted to bring our old CQR, once removed, with us (stowed away) for deployment in case of an emergency or storm.

But, finding a place for that guy … while I thought it was going to be rather hard, I’m pleased to say it was rather simple. I’m telling you guys, our boat is a storage dream.
Our old CQR sat down nice and snug in our port lazarette, along with our spare Danforth, not to mention the dock lines, spare engine parts, life raft, auto-pilot, fishing gear, bungees … I could go on. That thing is a black hole. Note, we did enlarge that locker, when we were on the hard in 2016, by sacrificing some engine room space with a removable wall that allows the port lazarette to extend further into the engine room. It has turned out to be a very smart trade-off, because we can remove that wall (or maybe it’s a bulkhead on a boat … whatever you want to call it) when we need to work on the engine to give us full access back there. With the extensive work we did down there this past year on the hard in 2018, it proved well worth it.

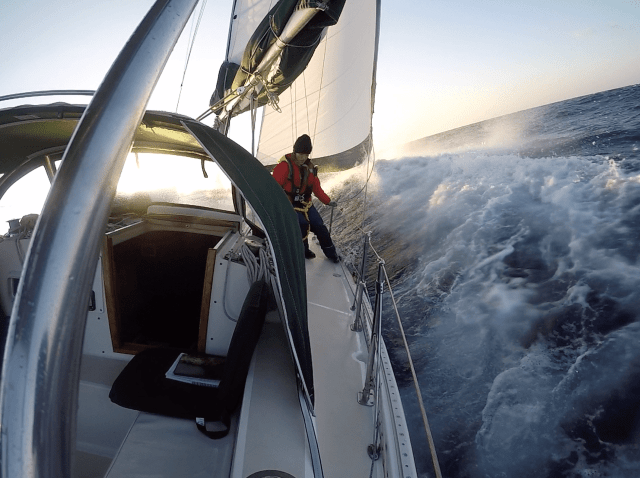
Filled and Tied Our Jerry Cans
We made a board that bolts onto the lifelines before our trip to the Bahamas in 2017 out of synthetic patio decking (so no rot or rust) that is easy to install and un-install when we are not sailing offshore. We filled three 5-gallon Jerries with diesel, one 5-gallon of water, and two 1.5 gallons of gasoline and strapped them down. Hence my lyric: “My Jerries are strapped, I’m ready to go!” : )

IS THAT ALL?!
Whew, man, did I get everything? I know, it can seem daunting. Preparing to cruise is no joke and takes weeks of planning and work. While it can be stressful, and hard to squeeze into your already busy, full work days, the process is infinitely rewarding when you finally shove off and it’s just you, full sails, the horizon, a pile of books to read and a can of nuts to munch on (or at least that’s what’s by my side out there!). Hope you all learned a little about boat prep and how Phillip and I like approach it. We get better and quicker at it every time, which makes each subsequent cruise that much more rewarding. Hope to see some of you out on the water on our way to the Bahamas!


And, sing it with me people: “I’m leeeeaving on a sailboat. This time tomorrow, we’ll be in the Gulf afloat. Leeeeaving on a sailboat.” Have fun following along!
Hey guys if you guys come in the Marathon Florida Keys way We have lots dockage and a Car…….Following Seas Jon
Man, thanks Jon. We’re going where the wind takes us. Appreciate it!
Wow, what an amazing offer. Next time we’re there, we may have to take you up on that. Thank you!
Another terrific post. Some day, you should poke your noses into the waters of New England. Believe me, I understand the appeal of the Bahamas. Just saying our July-September sailing is nice up here.
Love your rigging and outfitting information. Very helpful. Everyone I know who has a composting head sings its praises. Our boat doesn’t have space or I’d be installing one, too. And, Black Box wines. What a gift to the cruising sailor!
Keep blogging.
Norm
Cape Cod
Thanks Norm. We always aim to share helpful info as boats are a constant puzzle and source of projects. We love when we come across “fixes” or upgrades that improve our quality of life on the boat and/or the boat’s performance. We do love the composting head. I have no regrets. Only positive things to say. It has been a vast improvement. Glad you enjoyed the post. We will definitely do New England one day. We’re planning to do the Great Loop sometime after we finish these few years in the Caribbean. Good to hear from you Norm! Cheers.
I look forward to your next blog about your trip south. Hopefully, this time next year, I will be dropping my dock lines and sailing out of Pensacola Pass to follow your trail!
Thank you Peter. I do love to write and share. It’s a passion of mine. And, cruising is such a rewarding lifestyle for us. Lots of challenges that make the rewards that much sweeter. And, it’s amazing to share it with someone you enjoy who challenges you. Glad to hear you’re headed out soon, too. Fair winds to you!
We hope so too! Fair winds to you! Thank you.