Would You Continue an Ocean Voyage Without an Engine?

It’s funny, seeing it now—in black and white in hindsight—I’ll admit the answer seems so clear and easy, but it sure wasn’t then.  I guess when it’s you out there, only two days into what was supposed to be an incredibly exciting adventure, an awesome offshore accomplishment, and you have sails and promising winds, it’s quite tempting to want to continue.  Conquistadors and explorers have been crossing the ocean for centuries without engines, right?  They also did it without satellite navigation, AIS, sat phones and texting devices, a whole host of equipment Phillip and I use extensively when we sail offshore.  Bottom line is, after we lost the ability to use our engine when the fresh water pump blew, it was a tough call for Phillip and I deciding whether to continue our trek east, then south down to the BVIs, or tuck our tails, turn around, and sail back to Spanish Wells, Bahamas.  Many factors played into our decision, and it was a great exercise in balancing risk versus reward.  Read on to see what you would have considered had you been in our shoes and let us know: WWYD?

November, 2019:

“So, that’s it?  No engine?” I asked Phillip, although I already knew the answer.

“That’s it,” he said matter-of-factly.

Then we bobbed for a few quiet minutes.  The wind was blowing maybe 4, the sails were flogging gently, somewhere a halyard banged.  The quiet was deafening.  I didn’t realize before how much sound-space the engine had filled now that he was dead. R.I.P. Westie.  Phillip and I were only two days out on an expected 7-9 day passage from the Bahamas down to the BVIs when Westie (our 27A Westerbeke’s) fresh water pump bit the dust.

IMG_6632

While we were still floating safely, not taking on water, with sails and rigging still in perfect condition to carry us, Phillip and I had a tough decision to make:

CARRY ON UNDER STRICTLY SAIL 6-7 MORE DAYS TO THE BVIS

or

TURN AND SAIL 1-2 DAYS BACK TO THE BAHAMAS?

While we do prefer (always) to sail in the right conditions, rather than motor, Phillip and I are not 100% purists.  We don’t sail into and out of the marina or our slip just for the heck of it (like we often saw many heartier sailors (kids even!) do in France and the Azores).  We don’t sail narrow cuts or channels if we’re afraid the wind may shut down or push us onto a shoal.  Simply put, we prefer to sail when sailing is safe.  And, I’m not in any way ashamed to say we rely on our engine for many things: propulsion when sailing isn’t productive or safe, a charge to our batteries, maneuvering in marinas and in and out of slips, even as an extra bilge pump if we were taking on immense amounts of water (a trick I have, thankfully, only read about, never experienced myself, but that I will always keep in my back pocket).  At the end of the day, the truth is we put a lot of work, time, and money into our engine because we value it.

116

Phillip and I are also very risk-averse.  When your first offshore passage (ever!) is one where you have to lean over the stern rail in rough seas and 30-knots of wind to cut your own flailing dinghy off with a hacksaw, you tend to give the open ocean its well-deserved respect and due.

11148761_897676813635844_4726107904493492550_n

But, that said, Phillip and I really wanted to make it to the BVIs.  We have yet to sail their on our boat.  It is the first step of another BIG goal we have: to do a Caribbean Circle.  We had a work and weather window in November that had lined up beautifully (when does that ever happen)?  And, we were expecting good, solid east winds over the next 4-5 days that could have possibly enabled us to finish the voyage under sail alone quite safely.  And, there’s no reason to shy away from it.  We simply didn’t want to give up.  We didn’t want to quit.  We probably debated this decision a laughable hour longer than was necessary just because we were so frustrated by it.  But, after extensive discussion about the pros and cons of either choice, Phillip and I eventually decided to turn back and sail back to Spanish Wells in the Bahamas.  Here are the top reasons for our decision:

1.  Loss of Power

Battery power—or, more accurately, the inevitable loss of it—was easily our number one concern.  While we have 200 watts of solar on our boat, they are not able, by themselves, to keep our bank completely charged 5-7 days underway, particularly with the auto-pilot working twenty-four hours a day, as well as the navigation instruments, AIS, and nav lights at night.

While we can (and have) foregone refrigeration while underway to save on power, cold drinks and food were the least of our power worries.  Phillip and I knew we would want auto steering the boat as much as possible.  We would want AIS, particularly at night, to avoid ships.  We wanted our nav lights shining like bright beacons at night to ward off other boats.  We wanted our bilge pumps to be strong and vigorous if in the very unfortunate occurrence we started taking on water.  All of those things require power.  The thought of gradually losing power over the course of 6-7 days, losing the ability to see other ships, and be seen by them at night, as well as a potential inability to access our digital charts for navigating, all while the wind (particularly light ones) pushed us whatever direction it felt like was just, hands down, a scary thought.  An unacceptable thought.

2.  The Navidad and Mouchoir Banks

My good friend, Pam Wall, had warned us about these reefs on the north side of the Dominican Republic when we first told her of our plans to take the I65 Route from the Bahamas to the BVIs, and she urged (quite strongly, in pure, energetic-Pam fashion) that we sail a hard-and-fast route dead east (“Not south!” she shrieked) for the first 3-5 days of our voyage before turning south to avoid these reefs.  “They eat yachts,” Pam said, quite bluntly, which put the fear of Mouchoir in us.

Mouchoir_Overview-1

Being out there with no means of propulsion other than sail, and potential winds that could push us up onto those yacht-eating rocks was easily our second reason for turning back, but there were others as well.

3.  Navigating a New Inlet and Port Under Sail Alone

While Phillip and I knew we were going to be coming in—whether we decided to sail to the BVIs or back to the Bahamas—under sail alone, having navigated the entrance to and from Spanish Wells several times now (during this trip in 2019 and previously when we sailed the Abacos, Eleuthera, and a sliver of the Exumas in 2018) we felt we had become somewhat familiar with its channels, depths, and shoaling.  Navigating a brand-new inlet always stands the hairs on our necks and gets our hearts pumping.  The thought of doing that under sail alone with no contacts there in the BVIs was a mark against continuing the voyage without an engine.

4.  We Thought the Sail Back Would Be Short and Easy

Aside from not carrying a spare fresh water pump, this was our one whopping mistake in this whole ordeal.  Having just poked out into the Atlantic a day and a half, we thought the sail back would be a quick 1-2 days zip back.  Super easy.  No problem.  We figured it would be a bit of a bummer, with beat-down morales, retreating back from whence we came.  But, all we thought we would be was a little bummed.  We had no idea we would be psychologically battered.  As wild as it sounds—even with the two ocean crossings Phillip and I have done and some of our more horrendous bashes in the Gulf—that three and a half day sail back to Spanish Wells in little to zip wind was BY FAR the absolute worst passage Phillip and I have ever been on.  The.  Worst.  Have any of you ever been mind-numblingly, infuriatingly becalmed?  Just wait … We have stories to share my friends.  And a casualty.  There was mutiny out there.  Stay tuned!

Sailor Up! A Bitchin’ Article in Cruising Outpost

Dang, who’s that chick at the helm?  This is so fun to share followers.  Bob Bitchin’ published another one of my articles in the Spring 2019 edition of Cruising Outpost.  What a fabulous honor!  Please go pick up a copy to read it and tell Bob and the lovely Jody what you thought!  I wrote this piece during our voyage back last year from the Bahamas because it felt so empowering to be able to—now, after many voyages of practice—confidently take the helm and know the boat is under my control and that I’m just as capable of steering her as Phillip.  That’s such a comforting feeling when it’s just the two of you out there covering many miles.  Honestly, ladies—my badass female sailor following—I can’t emphasize enough what a confidence-builder it is to take the helm and maneuver the boat.  Sure, it’s horrifically scary at first.  There may be some tears, some pee, some shakes, some bumps and scrapes on the boat.  But, keep at it!  You’ll get better, I promise.  You’ll get more accustomed and aware.  You’ll get more confident, and (BONUS) your significant other will get wildly turned on.  You’re welcome!  : )  Ladies, it’s time to …

Photo thumb courtesy of the HaveWind followers who first spotted my article and were kind enough to take and send me the shots for this post.  Thanks again David & Mary!

BV19: How To Rig a Whisker Pole

Or how we rig it on OUR BOAT, I should say.  Ahoy followers!  You ready for a little virtual sailing lesson?  That’s right, float away from your desk for a minute, imagine yourself on the sunny deck of a gently-swaying boat, looking out over green, glistening water. Can you smell the salt in the air? I hope so!  But, there’s only one thing that’s bugging you: that occasional luff-crumple-pop of the headsail.  The light winds over the stern combined with a kicked-up sea state is causing your easy downwind run to be much more of a strain on your headsail than you would like. Every third wave, she luffs, curls, and then snaps back out with a vicious pop when she fills again.  I know you’re cringing right now hearing it.  So, what do you do?

Rig a whisker pole!

We’re going to share with you today a detailed step-by-step process, with photos, of our whisker-rigging method as well as some tricks and very important lessons we learned when first working with and learning how to rig the whisker pole on our boat while we were cruising in the Bahamas, namely the following:

  1. Where to attach the outer end of the pole (the Pam Wall Rule).
  2. What else to attach to the pole (the Captain Frazer Rule).
  3. And, where to attach the pole first (the HaveWind Rule).

All lessons are free today. Feel free to learn some at our expense!

No one likes to hear a sail pop and flail.  I always feel like it’s a dog yapping and running around in circles because thunder scared him.  You just want to hold him close and calm him down.  Yes, I would do that with our sails if I could.  In a heartbeat.  But, unfortunately, I can’t.  Trust me, I’ve tried.  Our jib just kicked and squirmed and whacked me solid across the face.  Thanks Wendy.  Don’t try to be a human whisker pole.  Be smarter than me.

As I mentioned in the spinnaker trainer video I shared in our spinnaker video last week and in our Bahamas Boat Project Recap, for Phillip and I, getting our whisker pole functioning and learning how to safely and comfortably rig it ourselves underway, was one of our big “sail plan” goals last year while we were preparing for our trip to the Bahamas. Our sail to Cuba in 2016—bashing for days into strong head winds—taught us many things.  One was that we needed to expand our sail plan and hone our sail skills to have more options to keep our boat and the crew sailing safely and more comfortably in a variety of wind speeds and directions.  Mastering the whisker pole was a key factor in that.

If you recall, in our Bahamas Boat Project Recap, I talked about what we had to do to get our whisker pole ready for cruising.  While she came with the boat, and rode with us idly for many years in two handy little stanchion post brackets on the starboard side near the bow, we had not actually used our whisker pole for years because she had a glitch.  She had a rather significant dent that prevented us from being able to slide the extension out to make it long enough to actually reach the sheet of the sail.  This meant for years we were lazy and just didn’t use her. Bad sailors!  You can say the same thing about us with the spinnaker.  We didn’t bust ours out on the boat for years just because we thought she would be big and cumbersome and we might rip her during the launch or douse.  Again, bad sailors!  Why would you skip out on allll this awesomeness over fear of failure!

We’ve since learned you have to just get out there and try stuff.  If you’re afraid you might damage a system because you don’t know exactly how it works, then ask a more experienced sailor to come out on a sail with you (offer beer or other booze and snacks, of course) and figure it out. Yeah, you might break something, or find something was on the verge of breaking anyway, but it would be better to break it or find our it was about to in the comfort of your home waters, not while underway across the Gulf or some other blue-water body, am I right?  As a good friend of ours often says (Tom, if you’re reading this), when the sailing gets boring, he smacks his hands together and says: “Time to break some shit!”  It is a saying Phillip and I have readily adopted on our boat, hand-clap and all.

You can’t be afraid to try something out just because you might break it.  And, I can say all of that lofty inspirational stuff now because Phillip and I were pansies for years and did not fly our spinnaker or use our whisker pole simply because we didn’t quite know how and didn’t take the time to figure them out, get them working, and get ourselves used to using them.  Shame on us, I know!  But, that’s why I can boldly write this post, because we have since done just that and I’m proud to share.

Now, the dent in our whisker pole.  That was a fun story.  Phillip had the idea for me (and specifically me, specifically in spandex) to take our dented pole to an auto body shop to see if they could work the dent out (much like they do on vehicles) to get the pole’s extension capabilities functioning again. And while I had every intention of paying them for their work, the guys had such a great time ribbing each other and working on this “oddball boat thing” they called it, seeing who could work the ding out the best, while I watched in spandex, that they just did it for free.  I tried and offered repeatedly to pay, but the owner, Travis, said it was such a fun show to watch, he was happy to help a local for free.  So, many thanks again to the great guys at Coastal Body Works here in Pensacola for getting these sailors up and going again!

Once we had the whisker pole working, we then started to toodle around with it on the boat and found that while a whisker pole can be very useful in light winds where it’s not quite enough to keep the headsail full or not the right angle for you to fly the spinnaker, what we learned during many of our downwind sails during our time in the Bahamas, was that it can also be useful when there is enough wind for your headsail, but a churned-up sea state, and accompanying erratic movement of the boat, keeps causing the sail to cave, crumple, and snap back with a bang.  Not cool.  This was one of our biggest “aha!” moments with our whisker pole.  You can see in this photo the sail is luffing and will soon snap back once the boat tips and it fills with wind.

As we all know, luffing and popping is not good for the sail.  And we had some decent wind here in this photo.  I believe it was blowing around 8-9 kts, plenty to keep the sail full … in smooth seas, but not enough to keep her taut when the boat is bucking around in churned-up 2-3 footers.  What Phillip and I did not know, initially, was that the whisker pole was something we could not only use to get more wind in the sail on a light-wind downwind run, but also something that could prevent luffing and popping in kicked-up seas.  Very cool.

And once you rig it in some funky seas, you’ll find the boat rides smoother.  The crew is more comfortable not having to listen to that occasional crumple and bang.  And, the boat is infinitely grateful for the more comfortable set-up.  Having made several mistakes in the beginning (don’t we all?) Phillip and I learned a few helpful tricks that allow us to easily rig the pole in most conditions and to even furl up the headsail quickly without having to un-rig the pole.  Pretty cool, huh?  Now, I will be the first to admit most of these very cool tricks were learned at the hands of other, more experienced, sailors: friends and mentors who have many (many!) more blue-water miles under their belts than we do, and from whom we love to learn.  So, a big thanks in advance to the ever-amazing Pam Wall and our fellow Captain and friend in Marathon, Captain Russell Frazer, and his exceptionally-skilled wife, Lynn, for sharing some of these tips with us.

Our Three Biggest Whisker Pole Lessons

  1. Attach the pole to the sheet, NOT the clew of the sail (The Pam Wall Rule)
  2. Rig preventers fore and aft (The Capt. Frazer Rule)
  3. Attach the pole to the sheet first, THEN the mast (The HaveWind Rule)

The Pam Wall Rule: Attach the pole to the sheet NOT the sail

I actually recall when we were speaking with Pam about this.  It was during a work/play trip to Ft. Lauderdale.  Sometime in the spring of 2016, I believe.  And she and Phillip got to talking about this whisker thing on the boat.  I wasn’t really sure what they were talking about, but I always hate to interrupt because of my own confusion (because it’s so frequent) so I did what I often do in a situation like that.  Pretend and nod and try to say stuff that won’t expose my ignorance. I remember Pam mentioning some sail training video she had been involved with but when she saw the final product, and the “whisker pole was attached to the clew!  The clew?!” (she shouted) she told the production company she did not want her name anywhere near it, because that was not right.

Now, did Pam’s comment make sense to you?  Me, I had no clew, pun intended.  At the time, that is.  I’ll be the first to admit how much more I still have to learn about sailing, but I have come leaps and bounds since my first few years with Phillip and, thankfully, that makes sense to me … now.  Phillip, who knew immediately what Pam was talking about then and who fervently agreed, won her salty, sailing heart over right then and there.  Pam’s a sucker for a good sailor.  Sorry, Pam, the word is out.  But, it didn’t come full circle for me until Phillip and I began rigging up our own pole on our boat and I then realized why attaching the pole to the CLEW was just about the worst thing you could do.

Imagine if, for some reason, somehow, someway, that pole got unclipped from the mast.  Because that never happens on boats, right?  Something that was once fastened becomes unfastened? It could get whacked, cracked, loosened, a number of freak things that happen often underseas on a pitching, yawing boat.  Now think what would happen if that pole came unattached at the mast and it was attached not to the genny sheet, but to the clew of your sail.  Do you see it?  A huge pole being flailed and clanged and beat around on the front of your boat? It’s like the genny is a big ring master and the pole at the end of her sail is like a big metal bullwhip.  She’s slashing and snapping just for the fun of it!  And, how do you get that pole secure?  Without getting knocked unconscious first?  The answer is: you may not.  Finding your headsail with the leeway to sling and bang that thing around however she would like is not a situation you want to be in.  While there may be a bang or two if the pole comes unattached at the mast and is attached only to the sheet, eventually the pole will likely settle to a fairly-secure place on deck or get tossed overboard and remain hanging from the sheet into the water.  Which outcome would you prefer to find yourself in?  The bullwhip or the dangler?

Now that the “clue” makes sense to you, take a very good lesson from Pam and apply it on your own boat: NEVER ATTACH THE POLE TO THE SAIL, ATTACH IT TO THE SHEET.

Thank you Pam.  Moving on.

The Captain Frazer Rule: Rig preventers fore and aft

While Phillip and I had thought about rigging a preventer forward, to the bow, and did that on our own initiative the first few times we used the whisker pole, we did not rig one aft. The preventer we ran to the bow was primarily needed, in our opinion, to prevent the pole from flying back and banging the shrouds.  We put waaaaayyy too much work into those shrouds when we re-did the rigging (from rod to wire) in 2016 to have anything slam into them.  Protect those shrouds people!  But, we had not yet run one aft, until we talked to a good friend of mine, Captain Russell Frazer and his wife, Lynn, who are both very experienced fellow sailors in Marathon, about our travels when we returned from the Bahamas back in March of this year.  Russell suggested running preventers both forward and aft so that you can roll the headsail up while still leaving the pole and its rigging in place.

This is another situation where rigging the pole to the sheet not the clew of the sail proves, once again, useful.  If the pole is attached only to the sheet, the sheet will then run smoothly through the mouth of the pole, allowing you to furl the sail up while the pole—held fast with the topping lift and two preventers—remains firmly in place for you to deal with at a safer time.  Imagine something crazy happened on deck (because that’s always possible), the seas kicked up and some metal piece flew off and put a nice rip in your headsail.  You want to get it furled (if you have a furling headsail) as quickly as possible to keep the wind out of it and prevent it from ripping further, or worse, shredding entirely.  If you have to go topside and un-rig the pole before you can furl the sail, you’ll have to leave your sail exposed and vulnerable while you do that, and if the seas are kicked up and things are flying around on deck, that’s not a time you want to be going topside and trying to wrestle a whisker pole anyway.  Instead, if you can simply furl the sail while leaving the pole securely in place until it is safer to go disassemble the rig, that would be a much better alternative.

So, the Captain Russell Rule: rig a preventer fore and aft.  And, thank Russell and his wife, Lynn, for that one!

The HaveWind Rule: 

Attach the pole to the sheet first, then the mast

 Boy, did it take Phillip and I a while to get this one.  Granted, we probably could have done a little more research before we got out there (this was on our way across the Gulf headed down to the Bahamas, our last day on a five-day run, almost to Key West), and we are doing it all so totally wrong.  Tssk tssk sailors!

We had decided to just “play around” with the whisker pole then, having not read much or watched detailed videos on the best way to rig it before just getting out there and tangling ourselves up in it.  We usually choose that method, though.  Part of it is kind of fun to figure it out yourself on your own boat and we would much rather be tinkering around with it hands-on, out in the sun, on the boat, than watching a video at home.  So, if it’s safe to learn OTB (on the boat), we like to do that.

But our efforts proved in vain here, as our first time trying to use the whisker pole we found ourselves struggling to keep a hold of our preventers and make everything work by attaching the pole first to the mast, then trying to finagle the swinging end of the pole, six feet away, to make it magically snag the sheet.  Silly us.  I know.  We just hadn’t thought it all the way through yet and were still tinkering.

After some experiments, we found it was much (much!) easier to first attach the pole to the sheet.  I usually do this while Phillip is holding the rest of the weight of the pole on the other side of the boat.  We have our two preventers, fore and aft, attached to the end of the pole at this time, and I usually have to push the pole out only about 2-3 feet over the side of the boat to get to the sheet.  We then use the pull line (I’ll call it that) that runs the length of the whisker pole and allows us to open the mouth of the pole from afar.  Once the mouth of the pole is attached to the sheet (not the clew remember!), I then push the pole slowly out while keeping a hand on my preventers.  You can either have these lying on the deck in preparation for cleating once the pole is up, or (if you’re really good and have them pre-marked or you’re just a much better guess of distance than I am) you can have them pre-fed under the lifelines and down to their respective cleats before you push the pole out.  We haven’t got that cool … yet!  Phillip then pushes the pole out its entire length while I keep a hand on the preventers and attaches it at the mast.  Then voila! the pole is up and holding our headsail out in a nice open and secure position.

We have found on lumpy downwind runs, this is a great way to get a little extra oomph out of light winds and some better rest for the boat and crew as she sails much more comfortably and quietly without the sail luffing and popping during the entire passage.

So, for a quick re-cap, this is our procedure, start to finish, of how Phillip and I rig the whisker pole on our boat.  As always, we welcome feedback, and hope this helps some of you bust out your own pole and start using it too!

How We Rig the Whisker Pole On Our Boat

1.  Check the integrity and functionality of the pole and its pull line (the line that runs the length of the pole and is used to open the mouth of the pole from afar).  Look to make sure there are no major chafe points in the line, or areas where the line looks like it might break).  Make sure the mouth opens and closes easily on each end of the pole. (Fighting that thing, once the pole is out and mobile, in seas is not something you want to do).  After years of no use, sitting up under the sun on our deck, we found our pull line had deteriorated and it broke clean in two the first time I pulled it (that’s why ours is wrapped around the pole in the photo here, we haven’t yet fixed it).  But a severed pull line is not something you want to happen underway when you cannot easily or safely reach your hands out to the end of the pole to detach it or you are forced to wrestle a pole on deck that is still gripped to your headsail sheet with a bad case of clench jaw.

2.  Once you confirmed the pole and its moving parts are working great, take the pole out of its holster and lay it athwartship (or hold it in hand or in your lap, with preferably two crew) while you attach the fore and aft preventers at the opening behind the mouth at the outer end of the pole.  You can then run the preventers out and back under the lifelines to their respective cleats if you would like, or let them fall free to the deck.  As Phillip and I get better at this, I plan to have two preventers with lengths pre-marked so I know how far off to cleat them in advance.  We attach our preventers to this opening (arrows below) behind the mouth of the pole, which is on both ends, where the topping lift also connects at the other end of the pole.


3.  With one crew member holding the pole on deck, the other crew member will raise the end of the pole by pulling and cleating the topping lift for the pole.  This is just an eyeball method to raise the pole roughly to the height of the clew of the sail.  If you are single-handed, I imagine you could attach the pole to the mast and deck cleats to secure it temporarily for this step, then detach them after you’ve lifted the pole so you can then attach it to the sheet.

4.  Loosen the sheet of the headsail so you will have enough slack to extend the pole out from the mast. (You can imagine how Phillip and I learned this one the hard way trying to wrestle that pole out.  It was just inches from the mast and we were pushing with all of our might, a definite set-up for a slip and fall, before we realized we were fighting the sail itself.)

5.  Attach the mouth of the pole to the working sheet of the headsail. Remember the Pam Wall rule: do NOT attach it to the clew of the sail.  Attach it to the sheet.  I usually have the pole extended about 2-3 feet over the side of the boat (with Phillip holding the other side near the mast), and I attach it to the sheet by setting the teeth (we’ll call them) on the sheet, then pulling the pull line from afar and the mouth then opens and drops down to snap around the sheet. My preventers, fore and aft, are attached at the time to that opening behind the mouth, and I am usually holding both preventers in my hands around the pole while I push it out.  You can see in the photo below, the pole is locked around the working sheet of our jib, right behind the bowline knot.  Our aft preventer has been computer-graphically inserted (as I mentioned we hadn’t yet learned to run one aft).

6.  Then slowly push the pole out (running the preventers through your hand on the pole, if they are not pre-cleated, so they do not go overboard), until the other end of the pole reaches the mast.

7.  Attach the other end of the pole to the ring at the mast.

8.  Secure or trim your fore and aft preventers making sure the pole cannot hit the shrouds. I like to push my weight against the pole toward the stern making sure it cannot be pushed back and make contact with the shrouds, if so, I will tighten the forward preventer.

9.  That’s it!  You’re sailing under the whisker pole!   Sit back and enjoy the no-luff-and-bang ride!

10.  When you’re ready to disassemble, remember, if you would like, you can furl the sail under pole, leaving the pole (secure under its topping lift and two preventers), firmly in place and then disassemble the rig once the sail is secure. Or, you can disassemble the whisker pole rig with the sail remaining out by simply following the previous steps in reverse.

I was so happy when we got this thing rigged up, I did a dance.  A pole dance.

Sorry, couldn’t help it.  Yes, that is totally me.  100%.  Every single rib.  All 40 of ‘em.  Yep.

Happy sailing folks!

BV18: Flying the Chute South to Little Harbour

If there is one thing the steady north winds in the Bahamas are good for, it’s flying the chute, headed south to Little Harbour!  Ahoy followers!  In blog time, we are just wrapping our stay at beautiful Hope Town, Bahamas (where we got lucky enough to snag a ball inside the harbor our first night there!) and sail this badass boat south to Little Harbour.  Under spinnaker!  I mention in the video below another video we put out last year showing exactly how we rig and hoist the spinnaker on our boat for any of you just launching yours (don’t worry, it took us years before we were brave enough).  Here’s the LINK to that trainer video.  Little Harbour turned out to be a fascinating little hurricane hole at the south end of the Bahamas.  We had some friends from Pensacola who were there at the same time on their Katana catamaran, so we got to rendezvous with them at the fantastically-fun and quirky bar, Pete’s Pub, and meet the infamous Pete, himself.  Pete is the son of Randolph Johnston, an American teacher and bronze sculptor who first settled with his family in Little Harbour in the 1950’s.  Some fascinating history there.  Hope you enjoy the video and photos below!

And, we’re off!  After a beautiful few days in Hope Town, we bid that quaint little cruiser’s gem adieu and set our sights on Little Harbour.  We had some friends, Tom and Christy, who were going to be there at the same time, sailing in on their Katana-built catamaran and we were eager to go meet up with them and have a drink at the famous Pete’s Pub!  There’s the Hope Town lighthouse in the distance.  Say “Au revoir!”

Anyone recognize this unique boat?  It’s Mary and Sharon on s/v Tipsy Gypsy!!  We met up with them several times in the Abacos (and both being fellow bloggers, but both partaking in some excellent goombay smashes at the time, we all forgot to take a photo together!).  But, true to boat code, I never forget to snap a pic of a fellow cruiser’s fine-looking vessel on the water.  Look at Gypsy go!  You can follower Mary and Tharon’s adventures here!  https://www.maryandtharon.com

It’s SPINNY time!  We love flying our spinnaker.  Well, I can say that now.  Phillip and I will be the first to admit, we waited waaaayyy too long to break this bad boy out.  I can’t really say why.  We were never in a hurry.  We thought it might have been a huge headache, or we would get it all snagged up and rip it.  Who knows.  We were crazy stupid. But, last summer, when we were planning our adventure to the Bahamas and knew we wanted to enhance our sail plan and sail options, we busted the spinnaker out on Plaintiff’s Rest for the first time (and found out she’s this beautiful red, white, and blue!) and learned how to rig her up and fly her with ease.  While it did take some finagling and some mistakes, we learned, they usually don’t lead to a rip in the sail if you are methodical about it and take your time to follow all of the lines and make sure the sail isn’t twisted as it is coming out of the sock.  Little things like that.  Now that we’ve mastered it, this is probably now our favorite sail on the boat!  Video link for you HERE again on exactly how we rig and hoist our spinnaker on the boat if any of you out there are just getting into it.

Ahhhh … happy place!

As I mentioned in the video, we found the inlet to Little Harbour to be a bit narrow and one you have to “play the tides” to get in and out.  Not a big deal, but we didn’t know when we would be leaving Little Harbour and we wanted to freedom to be able to come and go without having to wait on the tides.  For this reason, we decided to anchor on the outside in the big harbor outside of Little Harbour, and it was absolutely no mistake.  Wait until you see the crystal green waters that awaited us there.  Some of the most stunning we had seen in all of the Bahamas!

Dinghying in to Little Harbour!

This is Tom and Christy’s catamaran that they sailed to Little Harbour on, s/v Odalisque!

Looking out over the harbour.  We didn’t know it at the time, but Tom and Christy told us Little Harbour is a hurricane hole.  They have had winds of up to 130 mph there with little to no damage to the boats inside the harbor.  Good to know when Phillip and I find ourselves back in those parts and need to tuck in somewhere.  We’re happy to play the tide to sneak into a hurricane hole for cover!

Love this gal!  Hi Christy!

I can’t recall if this was the triggerfish tacos or not, but every meal we had at Pete’s Pub was out of this world!

The view from Pete’s Pub at night.  Just stunning.

And, hey hey, if we didn’t meet Pete himself.  A real ladies man, that one!  Heart of gold, too, and with such a neat history and story to share.  We made a lot of fun memories at the pub!

The sunset view on the Atlantic side behind Pete’s Pub did not disappoint either.  Gorgeous colors on the horizon and awesome craggy rocks where the water would splash up and put on quite a show!

After a fun night “on the town,” which in Little Harbour means “at the Pub” (it is the only restaurant bar on the island, but easily one of our favorite in all of the Bahamas), Phillip and I woke to these breathtaking waters right around our boat the next day.  I couldn’t take enough photos.  You could see every blade of grass on the bottom, every link in our chain, every glimmer of the sun.  I could stare at those waters all day long and be in absolute bliss!

One of the very cool things about Little Harbour, that struck Phillip and me, was it’s amazing history.  Not only did Randolph Johnston bring his family here to get away from American consumerism and just the hustle and bustle and noise of life in the states in the 1950’s, they also had to live in this cave for some time before they could complete their house.  But, they worked hard and persevered and the bronze sculpting foundry that Randolph established there back in the 1950’s is still the foundry they use today.  His son, Pete, carries on his tradition and makes some fabulous sculptures that he sells there in the gallery at Little Harbour.  I love when history meets art and makes the whole trip just that much more memorable.  Pretty cool huh!


Pete, finishing a very cool bronze sculpted shark!

This was a piece in the gallery that Christy really had her eye on, the evolution of the life of a man from baby, to toddler, to healthy male, to feeble old man, to death.  It really was a very unique piece.  You better get on it before Christy does!  If she hasn’t already!  (And she drives a hard bargain, trust me!  : )

Perfect tagline for not only Pete’s Pub, but just about every little quirky bar in the Bahamas.  You never know who is a millionaire, billionaire, boat bum, river rat, and the best part is no one cares because it doesn’t even matter.  We just “cheers!” and carry on!


We hope you enjoyed our trip to Little Harbour.  Next time, we will take you back out into the Atlantic Ocean on our way down to Eleuthra to our most breathtaking beach in the Bahamas (well, consider we haven’t been to the Exumas yet) but the north shore on Spanish Wells made my heart stop.  Thankfully, Phillip was able to get her kickstarted and going again.  He always gets me fluttering.  ; )  Stay tuned!

BV17: Marsh Harbour to Hopetown!

Enough with this maintenance in Marsh Harbour! It’s time to get sailing and set our hopes on Hopetown. This was one of our favorite stops in the Abacos. Many cruisers live here full-time on a ball in the harbor which gives the place a very welcoming, community feel. There are lots of quirky little shops, beautiful flower-lined roads and bike paths, great restaurants and the stunning Hopetown Lighthouse, one of the oldest manual Kerosene-lit lighthouses in the world. Phillip and I were incredibly fortunate to score a ball in the harbor our VERY FIRST night there (some people have waited years for one) and enjoyed a stunning three-day stay at Hopetown. Enjoy the snorkeling in Marsh Harbour, our sporty sail over to Hopetown, and a bike tour around picturesque Hopetown in the video and photos below.  Stay tuned next time for a trip to Little Harbor, a little-known hurricane hole at the south end of the Abacos where we were welcomed by friends who had just built an amazing little bungalow there. Plenty more to come!

On our way back to Marsh Harbour.  We were thrilled to find that a Delta flight opened up recently from Atlantic directly to Marsh Harbour, so that makes leaving the boat in the Bahamas while we fly back and forth to handle issues at home much easier!

I love the view from a plane window.  So much to see!


While we were thrilled to return, after leaving out boat in Marsh Harbour for six weeks while we flew back to Pensacola to handle some work things (and another huge thanks (and yet she still deserves dozens more!) to fellow Marsh Harbour live-aboard, Diane, who sent us amazing photos of our boat every couple of days while we were gone), we had plenty of work to do to open up and clean the boat and re-provision and prepare her for another two months of cruising in the Bahamas.  We spent the first day cleaning her, filling the batteries and propane, grocery shopping, turning the engine over, etc.  And, we were pleased to find our baby was just as excited as we were to have us back and she was full of juice and cranked right up on the first try!  Way to go Plaintiff’s Rest!

We were pleased to find, having left our Kanberra gel bins full while we were gone, that the boat smelled super fresh when we opened her up for the first time in six weeks and there was hardly any mold on the ceiling.  (In Pensacola, pre-Kanberra, we used to have tons of mold that we had to constantly wipe away with Clorox wipes during the summer).  This Kanberra stuff is the real deal people!

Filling the batteries.  Ours are Trojan wet cells that we have to fill with distilled water about every 30 days – 6 weeks.  I always laugh because Phillip looks like a coal miner when he does it!

We were thrilled the find our fancy wine bags were still in tact!

It had rained a good bit in Marsh Harbor while we were gone, which was actually a good thing because it kept the bilge flushed out and fresh.  We emptied her one time down to bone-dry to watch anew for any possible new leaks.

Then after all that work, it was time to go snorkeling in Marsh Harbour!  I got some great footage of the fishies and plant life in the video.  Hope you all enjoyed it!

Post-snorkel meal at the Jib Sheet.  Oh yeeaaaahhhh!

We packed away our Bahamas courtesy flag while we were gone.  She was only a little tattered from her first six weeks in the Abacos!

Back to our happy place!  Sundowners and read-time in the cockpit of Plaintiff’s Rest!

I made a new friend at the marina, too.  This amazing Labradoodle was so cute.  She would sit in this chair, looking very much like a human being, and watch as people walked by.  She was darling!

Sunrise over Harbourview Marina!

Time to de-dock (that’s a word in Annie land) and get this boat moving over to Hopetown!

It was a great day sailing, with winds of 18-20 kts.  On the nose, but we’ve got much better at reefing down our offshore 90% working jib (“Wendy”) so now anything up to 20 kts is still comfortable for us on the boat.  That did not used to be the case with our 135 genoa!

Following our waypoints on the Explorer charts to a “T.”  I love those charts!   They make cruising the Bahamas, even with a six-foot draft effortless.  Just follow their lat and lons and play the tides and you are golden!

We couldn’t reach anyone via the radio to see if there was an open ball in the Harbor at Hopetown (we were pretty sure they’re wouldn’t be as folks had told us cruisers covet those balls and hold them often for years), so we dropped the hook on the outside and dinghied into the Harbor to get a lay of the land.  It was kind of nice, too, to traverse that narrow inlet for the first time in our tiny little rubber boat, not the big beauty!

And, we totally scored!!  After talking to a few boats, asking around about a potential open ball (and having a few of them lightheartedly chuckle at us), we were finally sent to a guy named Dave on a catamaran who unofficially monitors the balls, and he got us in touch with this amazing guy, Truman, who runs the balls at the Harbor, and as luck would have it a couple was leaving that afternoon, so we were going to spend our evening ON THE BALL!  Phillip and I knew exactly how lucky we were and we were super excited!  But, the ball would not open up for a another few hours, so we headed to shore to grab a bite and explore!

And Hopetown, of course, did not disappoint.  Stunning Atlantic shores, crystal blue waters, stretches of white stunning beach.  It was everything we hoped it would be (no pun intended … okay maybe just a little one ; ).

We ate here at Brandon’s Bar on the beach, an awesome little salty lunch spot overlooking the Atlantic Ocean!

Pensacola representing!

These pictures don’t really do it justice.  But the sunsets and sunrises in the Harbor at Hopetown were breathtaking.  It was all you could do to just sit and watch and look around.  Something about all the boats floating around you and the colors on the water were just mesmerizing.

Time to go see what this lighthouse is all about!

Beautiful little flower-lined streets guided us along the way.  One of my favorite things about the Abacos are all the rich, luscious colors that greet you just walking the streets.  All of the pathways and roads are also very narrow, which means no freaking stink-pot, tank-sized SUVs.  Thank goodness!  Just little golf carts and foot traffic.  I have to say there is no part of me that misses the consumerism and traffic of the states.  None.

Helllooooo.

You cannot NOT go to the Bahamas and NOT get conch fritters (three times at least to compare at different places! ; )

There’s the lighthouse!  One of the last remaining manual, kerosene-lit lighthouses in the world.  This beauty was completed in 1864 and used to guide ships around the treacherous Elbow Reef.

We signed the book!  S/v Plaintiff’s Rest was here!  101 lighthouse steps we never fear!

Isn’t the view from the top amazing?  The striking colors of the water is always what catches my eyes and breath when we view the Bahamas from up high.

Got myself a little Hopetown Lighthouse trinket (and proceeds for buying this beauty go toward lighthouse preservation and restoration).  Cute huh?

Then it was time to explore more of that awesome little island.  We rented bikes (24 hours for $24, very reasonable) and spent the next day and a half biking around Hopetown.

It was even cooler to see the lighthouse from our ball in the Harbor after we had walked all the way to the top and saw the view from up there.

We left this little thank-you note and our “ball fees” ($20/night) on Dave’s catamaran, along with a bottle of white and one of my books as big thanks for his help in enabling us to score a ball our very first time there.  We certainly enjoyed our time and can easily say Hopetown is one of our favorite stops in the Abacos.  But, gees, it’s hard to even pick favorites.  There are so many.  Hope you all enjoyed the video and photos.  Next time, we will take you to Little Harbour at the south end of the Abacos and Pete’s Pub!  Stay tuned!


Post-Bahamas Boat Projects (We’re Dropping the Rudder!)

Schadenfreude.  I know it’s German, but I have no idea how to say it.  A good friend of ours taught it to us when he was telling us what great pleasure he took in seeing Phillip and I knee-deep in boat projects instead of wading in crystal green waters, cocktail in hand.  “Somehow I like the idea of you two working hard instead of playing in the Bahamas.  That must be the German side in me coming out.  And, did you know that Germans are the only culture that has a word to express joy in another’s discomfort or pain?  Schadenfreude.  Says a lot about the culture doesn’t it?”  He’s a funny guy, that one.  So, for Conrad and all the other brutal Germans out there who would take great schadenfreude in our boat project phase, this one is for you. Misery loves company!  Although I wouldn’t say Phillip and I are anything near miserable when we’re doing boat projects.  Seriously!  We’re usually smiling most of the time.  I know.  We’re those people.  Don’t you just hate those people?

We don’t!  We are those people!

Ahoy followers!  Following our awesome voyage to the Bahamas this past season, Phillip and I definitely (as we always do) racked up a pretty extensive list of boat projects to tackle when we got home.  Some were necessary repairs that we had been watching for a while and knew we finally needed to get serious about (think hauling out and dropping the rudder).  Joy.  Others are just for cosmetic or comfort reasons—some inspired by our cruising this past season—but we’re eager to get on those just the same.

And, if you’re starting to think we might just have a bit of a falling-apart boat because we sure spend a lot of time every year doing boat projects and maintenance, we’ll I’d have to say you’re just crazy.  Plumb cRaZy.  Boats require a ton of maintenance and upkeep.  Even ones (well, I should say especially ones) in great condition.  It took a lot of work, time, and sweat to prepare our boat this past year to take us comfortably to the Bahamas, but it was all totally worth it.  Phillip and I feel privileged and lucky to own such a fantastic, old blue-water boat that we’re honored to get to work on her.  At least that’s the word we use when we’re stinking, hot, sweaty, and cramped into some ridiculously-uncomfortable places while working on her.  “I’m sure honored to be here pretty gal,” I will whisper.  But our Niagara has definitely earned all of our spare time and money each time she cranks right up, pops out her sails, and whisks us away to another fabulous distant shore, usually steering the entire time all by herself.

With plans this coming season to likely head back to the Bahamas to truly enjoy the Exumas, which we did not have time to explore this past winter, Phillip and I are eager to dig our teeth into this summer’s list and get it knocked out so we can start the long and arduous process of provisioning and packing for our next adventure.  Hooray!  Who’s on board?  Let’s get this party started already!  Here is the actual (always growing) list:

Project No. 1: The Rudder

That’s a pretty important part of the boat, right?  Next to hull integrity, a sturdy keel, along with solid rigging and sails, the rudder is one of the only things that, without it, the boat simply cannot go.  In fact, without it, the boat might easily sink.  I have to admit that’s one of the things I really dislike about the rudder.  Its cruciality to both the ability of the boat to both navigate and remain bouyant makes it almost too connected and powerful.  Like a frenemy.

If you recall, we first noticed an issue with our rudder during our voyage to Cuba.

Yeah, that passage.  Bashing our way to windward for five days.  That was fun.  (Okay, it was, actually, but it was exhausting, too, and very hard on the boat.)  That much heel and that much wind puts a lot of pressure on the rudder and, after a few days of it, we started to notice some athwartship movement in our rudder.  I know what you’re thinking.  That’s not a part you want to see movement in.  It makes me think of the keel and how gut-wrenching it might be to watch it bend, even just slightly, from starboard to port as we heel over.  Uggh.  That seriously gives me goosebumps.  Unfortunately, that’s what we were noticing.  Each time the boat would heel with a gust of wind and climb to weather, the top of the rudder post in the cockpit would move about a quarter to a half inch from port to starboard.  We had a Rudder on the Loose!

Phillip and I both spent a good part of that voyage hanging upside down in each of the lazarettos adding extra nuts to the three bolts that hold our rudder cap in place on the cockpit floor.

For this reason, one of the projects on our list last summer while we were preparing to travel to the Bahamas was an interim reinforcement of our rudder by fitting some extra wide fender washers on the three bolts that hold our rudder cap in place.


We knew this would be a temporary fix for the season, though, and that, when we hauled out the following year, we wanted to drop the rudder and really do this project right.  After doing some research (which we are always thankful for the helpful and insightful fellow Niagara 35 owners on the Niagara 35 Owners Facebook Group who share lessons learned from projects like this) we found other owners head dealt with this play in the rudder as well and decided to reinforce the backing for the rudder cap on the cockpit floor.  It really is a sh&*-ton of pressure to all culminate at one very small round hole on the cockpit floor, secured by three small bolts.  For this reason, you will see in the photo below, one Niagara owner decided to add a very substantial backing plate around the top of the rudder post to help reinforce and secure it.

Meet Larry Dickie!  Ironically named after my own people, the infamous Alabama Dickeys (albeit a slightly different spelling).  After Larry posted this photo and a brief write-up about the project, we reached out to him and he proved to be a treasure-trove of information for this particular project and many, many others.  Here is what Larry had to say:

Larry Dickie‎ Niagara 35 Owners Group

January 26 near Horta, Portugal ·

“A couple of days ago I posted pics from the N35 rudder rebuild I did. I neglected to add this critical piece, applicable to all versions of Niagara (IMHO).  The area in the cockpit flooring is, where the top of the rudder post exits, simply not strong enough to take the very severe and continual torque associated with long passages (or possibly even much shorter passages). I had been warned about this by another N35 owner, years ago. But this repair/upgrade somehow fell off the hundred-job list before we departed. Even though I had placed straight thickened epoxy for several inches around the area when I recored the sole, it was still not strong enough. A few days off Horta, during a dismal night watch, I noticed the top of the rudder post moving slightly as we came off each wave – boy, not a good feeling in the pit of my stomach there.

Now, let me be the first to admit this is not the prettiest fix. But in the Azores, you can only really get good boat work assistance in Horta (Mid-Atlantic Yacht Services). They made this plate for me, as per my napkin drawing; it was based on the fact that there was limited space undernearth to place thru-bolts. Yes, those hex-bolts are not the prettiest, but all that was available. If back in Canada, I would most likely have buried this whole plate within the sole and epoxied over it. All things considered, I’m more than happy with the end result – top end of the rudder now does move at all, even in heavy seas.
All this to say to other N35 owners who are, or contemplating heading off: shore-up the rudder post at the top end (assuming many of you already have).”


Did you note Larry’s location when he posted that?  Horta, Portugal!  That’s right.  The Azores.  Those magic islands Phillip and I were exceedingly lucky enough to be able to visit and enjoy during our Atlantic-crossing with Yannick.  There is something special about that place, I tell you.  Something indescribable.

We certainly plan to sail our boat across the Atlantic someday, stopping at both Bermuda and the Azores again, so it was nice to see another Niagara 35 making the trip.  Larry was very generous to share his experience with this issue with us and his extensive upgrade.  When we haul-out this summer, we plan to drop the rudder and install a similar wide backing plate in the cockpit floor, likely glassed in, to reinforce and further support the rudder post, particularly at the potential pivot point here where it is secured at the cockpit floor.  Our buddy Brandon with Perdido Sailor, Inc. also advised us he has seen this issue before where the rudder post also actually becomes worn down from use and is not as tight in the bushing, allowing for play.  If he finds that is the case with our rudder, he recommended we add a thin layer of epoxy along the post to literally “widen” it back up so that it is a snug fit in the bushing preventing movement.  This will be an extensive project. Likely our most complicated and costly of the summer.  But we never want to see movement in the rudder post again.  That is a very frightening thought when your boat is pitching and tossing, trying to hold course in heavy seas.  Stay tuned.

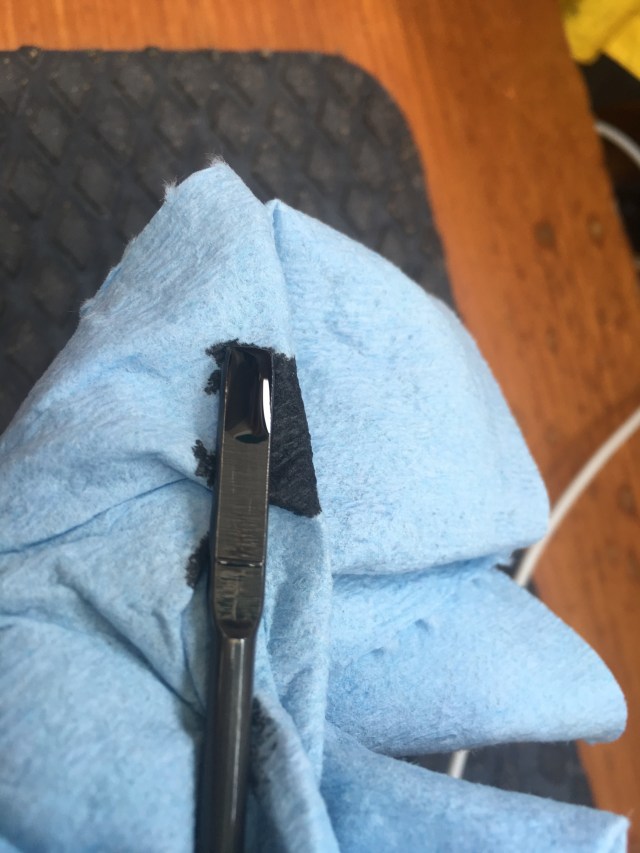
Project No. 2: Prop Shaft Key

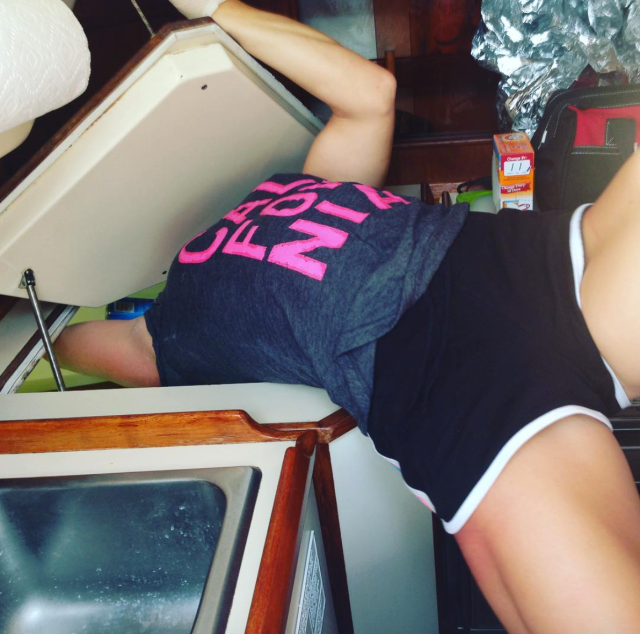
This is key.  We’ve been battling this guy for a while.  And, I have to laugh because at times I have to really feel sorry for our boat.  It’s like she tries and tries to gently show us there’s a problem.  She wiggle a nut loose, squeeze out a few drops of fluid, or let out a repetitive thud, thud, thud which should translate to “look here,” “hey, check this out,” or “I need tightening here,” and what do we do?  Wipe the drips and turn up the radio!   Not really.  Honestly, Phillip and I are pretty diligent boat owners, but it still surprises me at times even when we were looking and listening, as we always try to do, that we still miss the very obvious cues.  So, this key.  It is kind of hard to see in this photo, but it is about a three-inch long square rod, basically, that slides into a slot along the prop shaft.

In our boat, we have a v-drive transmission where the engine sits in backwards and the transmission is actually in front of the engine.  When we pull the hatch back (which is actually our entire galley sink and countertop (it’s pretty freaking badass if you ask me, one of my favorite design elements of our boat for sure!), the transmission, coupling, and end of the prop shaft are immediately visible.

And, at the end, we have a key that fits in a slot on the prop shaft and helps the shaft grab and turn the coupling (in addition to a set screw and two bolts on the coupling that tighten down onto the prop shaft.  All fascinating stuff, I can assure you.  But, this stupid little key.

My God, the hours Phillip and I have spent dicking around with this key.  The thing would not stay in.  I can’t tell you how many times we have spent watching it wiggle out, sometimes halfway, other times entirely and we would have to fish around in our super clean bilge to find it, all to then hammer it back in with some Loc-tite and hope for the best.  It seems like such a terrible design.  Eventually we watched as the prop shaft itself began to—much like the key had—inch forward toward the bow of the boat and actually protrude a quarter-to-half inch in front of the coupling.  Those were good times.  And, I’m saving for you the story of what happened when the shaft creeped too far forward.  My point in all of this is to hopefully get you chuckling as much as we were when we finally realized what our amazing boat was trying to tell us with all of this key business.  “My coupling is loose!” she was screaming.  Poor boat.  She’s such a trooper when it comes to us, I tell you.  While the two bolts that tighten the coupling down onto the shaft had seizing wire on them, which is why we did not suspect they could loosen, we have learned anything that rattles on a boat can loosen (and wire can stretch!).  After we finally tightened the bolts on the coupling back down, the key hasn’t given us any further trouble.  But!  We’re thinking about having a new key machined that has a hole for a seizing wire so we can prevent any further “rattle out” issues in the future.  Rattle is real, people.  We’re taking measures!

Project No. 3: Some Westie Love!

Boy does he deserve it.  “Westie” our 27A Westerbeke engine in the boat.  He’s been performing like a champ.

While we try to take very good care of him, always looking for leaks, tightening screws and bolts that rattle loose, keeping a very close eye on his coolant system, and changing the oil every 50-75 hours, Westie is getting up there.  He is the original 1985 engine on the boat with about 3,600 engine hours on him.  Plenty of life left for sure, but we do need to replace the exhaust elbow that goes to the manifold and the manifold gasket, give him a super scrub down (knocking off the flaking rust) and perhaps re-paint him and reinforce his stringers as they have spread and deteriorated a bit with water leaks (particularly on the starboard side under the water pump).

We will probably also drain the coolant system and change out the coolant and replace the gaskets around the thermostat as those tend to leak often.

Project No. 4: Forestay Maintenance

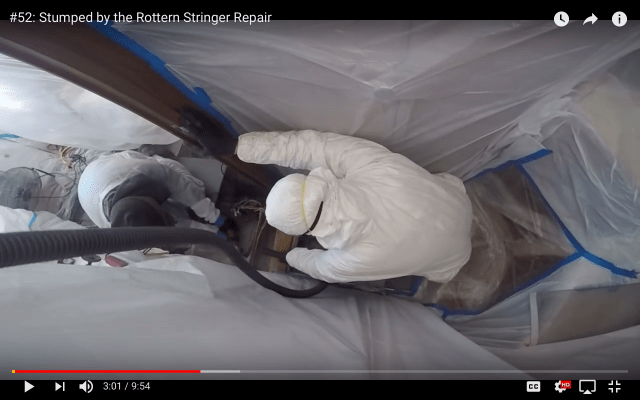
As many of you are aware, we replaced our original rod rigging with universal 5/16 wire rigging when we spent three months in the shipyard back in 2016 re-building our stringers (and doing a hundred other things).  Those were good times.  Videos for you here if you haven’t seen them (Raising the New Rig, Part One and Two).


Brandon said we deserved a “Boat Yard 101” training certificate when we splashed back because that was an absolute hard-core crash-course in boat maintenance and repair.  But, while it definitely sucked finding out the very important stringers under our mast were rotten and that it was going to cost several thousands to fix, those three months (and all the money) we spent in the yard in 2016 was the absolute best thing we could have done as boat owners.  There is no way we could have learned as much as we did from dedicated, knowledgeable boat repairman, craftsmen, experts, had we not spent that time side-by-side with Brandon and his crew at the shipyard.  So, we don’t regret it.  Ever.  And, it was time to replace the rigging anyway, so the timing actually worked out.

But, although our rigging is new (or, better yet, because it is new) during the course of our sailing the past two years, it has stretched.  Phillip and I noticed a little looseness in our forestay that caused it to (for lack of a better word) “warble” while we are furling the headstay, particularly our larger 135 genny, and particularly during the last 5-6 rolls of the drum.  So, we contacted Rick over at Zern Rigging and his guys came out to check our forestay tension.  While one of his main guys, DJ (we love you!) inspected it and said our forestay was actually tighter than most, he found we could afford a bit more tension so he and his guys tightened it up for us.

He also noticed immediately the grinding and difficulty in turning our furling drum (something Phillip and I have noticed for a while but figured it might have to do with the looseness of the stay).  DJ, however, explained that it would be easy for us, and quite prudent, to re-build the furling drum and replace the bearings inside as they just age and wear over time with salt and dirt build-up in there.  So, Phillip and I will plan a day while we’re in the shipyard to do that as well and I know that will work wonders when we’re furling in heavy (or any, really) winds.

Project No. 5: Swap to a Composting Head?

We’re hoping to.  At least I’m hoping to.  We are definitely keen on the idea of gaining the additional storage space where our 25-gallon “turd tank” currently resides under the v-berth and the theoretical convenience of no longer having to pump out or worry about holding tank leaks (been there, done that, gross!).

Phillip, however, is a little skeptical about the size and fit of a composting head in our rather small (and awkwardly-shaped) head compartment, as well as the comfort of sitting on and using a head so tall.  We’ve done a lot of research and talked to many boat owners who have switched to a composting head and have heard really awesome pros (like the ones I mentioned above) and the ease of dumping and cleaning the unit, no smell, etc. with just a few cons: the inability for urine to drain when on a particular heel, overflowing of the urine bin (if you don’t monitor it closely enough) and, to reinforce Phillip’s fear, the size and “comfort” of it.  Overall, we are on board if a composting head will comfortably fit, but our floor space in the head is very small and triangular-shaped.  I have been going back and forth with the Airhead guys (we believe they offer the right balance of look and fit that we want) and they actually drew a pretty to-scale CAD drawing for me showing how the head might fit (cocked slightly at an angle) and we will likely have to build a small shelf to support the urine bin.


A friend of ours (you recall Phil who bought his first live aboard sailboat, a 1992 Catalina 28 which we helped him deliver last year) recently switched to a composting head so we’ve been learning a lot from him (always good to have a boat buddy make all the disgusting mistakes first, right? ; ) and he let us borrow his head to get a feel for whether it is going to fit in our boat.

It’s going to be a game of Tetris for sure, but I would really like to make this change this summer so I hope it works out.  Phillip has put this item exclusively on my list.  We’ll see how Boat Project Annie does.  Things might get shitty … : )

Project No. 6: The AC Inlet

The “AC Power” on the list.  We honestly had so many projects piling up, I forgot what this one was and had to ask Phillip.  I was worried we were going to have to re-wire our AC power system on the boat or something equally major that Boat Project Annie had decided to selectively forget because she knew it was going to be financially and physically painful.  Thankfully, it’s not too bad.  On our boat, we are always chasing leaks.  All.  Ways.  And, we believe we’re getting some water in from behind the AC power inlet on the outside of the cockpit on the starboard side.

Phillip tells me it looks like a “mangled rat’s nest” in the back all gooped up with silicone and other adhesives.  So, we’ll be popping that out and re-bedding it anew with butyl.

Project No. 7: Re-Bedding Stanchion Posts

While we’re on re-bedding (which it seems we are always doing).  We’ve got a few stanchion posts that are looking a little red around the bed.  Once we start to see rust streaks leaking out around the base, that’s a sure sign that puppy is leaking.  We’ve re-bed approximately six of the ten on the boat, so this will be another 2-3 and will hopefully seal those up for the next 2-3 years.  I can’t stand having unknown leak sources on the boat!  We’ll keep hunting and re-bedding till we have a dry bilge darnit!  Boat Project Annie is no quitter!

Project No. 8: Jib Sheet Turning Blocks 

Our previous owner (Jack, you fantastic boat-owner you!) re-routed the sheets for the headsail to come through a set of blocks mounted on a stainless steel plate to improve his ability to trim and tack the sail single-handed.  If you recall, our previous owner used to single-hand our boat in the Mackinac race.  Pretty awesome, right?  Our boat has such a cool history.  We are very pleased with the upgrades he made, this being one, but over time the bearings in the blocks for the genny sheets have failed and we need to have these blocks and their brake levers re-built.

We’ve been very pleased with the products we have ordered previously from Garhauer so we will probably send them a photo or the block itself to allow them to rebuild blocks for us.

Project No. 9: The Fridge??

Hmmpffh.  What to say here.  Honestly, we’re not quite sure yet what we’re going to do here, if anything.  Bottom line is our fridge is original to the boat, which means it’s now thirty-three years old and operates on an antiquated Freon system with inadequate insulation.

We’ve had the Freon refilled and we’ve spent some awesome Saturdays wiggling ourselves into that torture chamber squirting Great Stuff around the seams to try and improve the fridge’s insulation and ability to hold temp.

The fridge, particularly in the hot summer season, is easily our biggest power suck while on anchor.  We’re going to debate dropping in a new Freon fridge this summer or upgrading to a more efficient, more modern model that fits in our boat.  Stay tuned.

Project No. 10: Switching to LEDs

 This has been an on-going project, but one we want to continue pursuing until we have converted all of the lights on the boat to LED.  We swapped out a few of our reading lamps and fluorescent lights to LED before we left for the Bahamas and we were thrilled with the minimal output.

Think 0.1 amps an hour to light the boat.  Ummm … yes please?  So, we’ll be ordering and installing LED lights throughout and adding more red options where we can for better lighting options during night passages.

Project No. 11: Canvas Work!

If our time in the Bahamas during December and January taught us one thing, it’s we do not like to be wet, drizzly, and cold on our boat.  Thankfully, we were not, mostly because we spent those wet, chilly, super-windy days toasty warm in our wetsuits kite-surfing!  Heck yeah!

But, it did show us that the more comfortable cruisers were the ones who still had a warm, dry “living room” they could enjoy despite the wet bitter weather.  They just had to zip up their enclosures in the cockpit and *bam* it was a toasty day on the boat.  While we may not use them often, Phillip and I decided when you need them, you really need them, so we’re going to get a quote and consider having a full enclosure for our cockpit made so, on those occasional cold, wet days either on the hook or especially on passage, we can zip up our cockpit and stay toasty!  We’ve already put in a request for a quote from our trusty local canvas guy, Tony with Coastal Canvas, for a complete enclosure (which we are sure will run us a couple thousand, if not more …. but it is what it is) as well as having him fix some of the snaps on our hatch covers that have ripped off.

Project No. 12: BOTTOM JOB!

And, of course, what do you always do when you haul out?  That’s right, you got it!  Unfortunately we had to scramble and pull of a bit of an emergency haul-out last October for Nate, we feel incredibly fortunate, however, that Nate was just a tropical storm.  Do NOT ask me how I’m feeling about this coming season.  Makes my stomach turn … But, it was a very good hurricane prep drill for us (thankfully just a drill) and also a chance to scrub the bottom, scrape off a few obstinate barnacles, and slap a few coats of bottom paint on for the cruising season, and we plan to do the same when we haul out this summer.  A bottom job has to be my absolute favorite job on the boat, you?  ; )

We may throw in a little buff job, too, while we’re there.  She always looks so pretty when she’s all shined up!

Let’s see … what else.  That’s quite a bit.  You guys are going to have a mighty fine Schadenfreude feeling watching us work our tails off this summer making our beautiful boat even more comfortable and getting her ready for more cruising this coming season.  While all plans are written in sand at low tide, the vague plan is to go back to the Bahamas and spend our time really enjoying the Exumas and then maybe heading south toward Grenada to keep the boat there next season.  We will see.  Either way, you know we’ll find a dozen other boat projects to add to the list once we get in there and that we will share with you and conquer.


It’s a boat, right?!  Broke Or About To.  But that’s why we love her!

Post-Bahamas Podcast – Shooting the Breeze Sailing Podcast

“Man, y’all are terrible at this!” I distinctly recall saying while talking to Jeffrey in this podcast interview about how our sail skills have improved the more offshore voyages we’ve done.  On the way to Cuba, our friends back home were right: we were terrible.  But on our way to the Bahamas, Phillip and I were much better thanks to our new offshore jib and a newly-anointed Captain Annie!  Ahoy followers!  My first post-Bahamas interview here for you, sharing a few of our fun Bahamas stories and misadventures.  Many thanks to Jeffrey Wetting with Shooting the Breeze Sailing Podcast at The Escape Pods for reaching out to me and putting this piece together.  Enjoy!

STBSP ep. 88: Annie Dike, Part Three, Bahamas!

10,000 Bluewater Miles

Ten.  Thousand.  I almost can’t believe it myself, but that’s my number.  10,025 to be exact.  I’ve been keeping track and when Phillip and I sailed our gallant Niagara 35 back into the Pensacola Pass on our recent return from the Bahamas, it was not only a fantastic feat successfully completing another offshore voyage, it was also a pretty cool milestone for this little sailor, who began sailing only five short years ago.  

Headed off on my very first offshore voyage: April, 2013

Captain Annie at the helm, returning from the Bahamas: April, 2018

Ten thousand … This calls for a ditty, no?

Five years, 5oo HaveWind posts, and one captain’s license later, and I dare say I just might call this little gal a bluewater sailor.

When Phillip first planted the seed, “I’m going to buy a boat and cruise around the world,” I immediately, without hesitation, heartily agreed!  “Not without me!” was my creed.

Our very first photo at the cockpit together during our first voyage.

So, we started boat-shopping and, little did I know, the many, many new, exotic places I would go!  In the bilge, in the fridge, “Get down in the engine room,” he said.


So down I went, bumping my knees, my knuckles, my head.  On that boat, I’ve cursed, and sweated, and bled.  There are so many, many things, you see, that have to be fixed, cleaned, fixed again, and re-bed.


But the good news is, as long as her hull, keel, and rigging are sound, you can work on her while you sail her anywhere, as long as you don’t run aground!  Because the worst, absolute worst, thing you can do to a boat, is to leave her sitting stagnant, unkept and going nowhere, just sitting afloat.

Not our boat, oh no!  Our beautiful Niagara, with her magnificent thirty-five feet.  She’s often cast-off, sailing away, on a gentleman’s (or perhaps not-so-gentle) beat.

That wise, seasoned boat has taught Phillip and I so much about both her and the sea.  Because out there, and you may not believe me, but she feels really rather small to me.  The time that she grows, seems unwieldy and impossible to stop, is only when we are approaching a treacherous dock.

But out there, in bluewater, while romping and running, she seems so agile and nimble.  Like a horse at the derby, impossibly stunning.

That’s where she and her crew love most to be — moving, gliding, slipping under sunsets at sea.


My heart and courage exposed, this amazing man and boat have challenged me, to push myself, try harder, learn more, travel further, set myself free!

So I did.  I changed my career, my address, my focus, all so I could head out to sea.  And the rewards have been limitless: Cuba, the Bahamas, Mexico, France, the Florida Keys!


All connected by big, brimming, bodies of blue, just waiting to challenge and test you, too.  Each passage, each mile, will teach you something new.

Forty-six hundred of them took Phillip and I all the way across the Atlantic, with a hearty, hilarious French Captain named Yannick.

But the Gulf of Mexico, never to be out-done, over and above the Atlantic, has, thus far, won.  The Gulf has handed us our most trying times, tossing and bashing us to windward, threatening to snap lines.

Thankfully the storms and rough seas generally do not last.  You just have to ride it out, get the boat comfortable, and usually in twenty-four hours or less, it will pass.

And soon you’ll find yourself motoring without a lick of wind, albeit across the most beautiful glass you’ve ever seen.

And you’ll make the mistake of asking Mother Nature to blow.  Just a little.  Like ten to fifteen.

Or seven and a quarter, perhaps, just enough so we can be #spinning!

While a perfect passage (in our world, a nice downwind run), from shore to shore is admittedly rare, the toying, tempting promise of it is what makes us accept the dare.

Because when you get there, no matter how near or far your “dream there” might be, it’s an incredibly cool feeling to have the honor to say: “We sailed here, you see.”

And for Phillip and I, I believe one of our most memorable offshore voyages will forever be: Cuba.  Because it was a trying, eye-opening, exceedingly-thrilling passage where we bypassed the Keys.  And Phillip and I both felt great pride in telling people: “We sailed six hundred nautical miles, here to be.”

Hope you all have enjoyed this little sailor’s first 10,000 nautical miles here at HaveWind.  Here’s to the next ten!  Cheers!

BV4 (VIDEO): Across the Gulf Stream to West End

“Never cross with a north wind!”  Can you hear it?  Pam Wall’s little energetic voice?  She repeated this warning many times when we first saw, heard and met her at the Miami Boat Show back in February, 2015.  I had no idea that amazing little enthusiastic woman would soon thereafter change my life.

Love that bubbly little lady!

After listening to her inspiring “Cruising the Abacos” seminar (and finding ourselves in dire hunger soon after for some “fresh baked Bahamian bread,” Pam always squeals when she says it) Phillip and I had originally decided back in 2015 that the first place we were going to cruise our boat to outside of the states would be the Bahamas.  And that decision held firm for a long time until we heard Cuba had thankfully opened up for American cruisers.  Heck yeah!

While the Bahamas were hard to pass up, we knew they would be there waiting for us the next season, and with the tumultuous state of American-Cuban relations, we weren’t sure Cuba would be.  That was when we decided to set our sights first on Cuba, and it was a fantastic decision.  Mine and Phillip’s cruise to Cuba in December, 2016 was a monumental, memorable voyage for us both.  It was our longest offshore passage (five days) just the two of us and it was the first time we had sail our beautiful little boat from the shores of one country to another.  What an incredible feeling!  I still remember when we watched the sun come up over the horizon on the fifth morning.

“That’s a Havana sunrise right there,” Phillip said and he played “Havana Daydreaming” most of the morning as we made our way towards the inlet to Marina Hemingway, singing heartily along as his late Uncle Johnny would have, who had also wanted to sail to Cuba but he unfortunately was not able to do so before he passed away.  I know Johnny was there with Phillip in spirit and I can still hear Phillip’s voice from that morning as he sat on the foredeck and sang.  “Oh he’s just scheming … his life away.”

Thankfully, we’re not just scheming.  We are going!  Our voyage to Cuba was a phenomenal trip and only told Phillip and I that we are ready to travel further and longer, just the two of us, on our boat.  So, in 2017 we decided we would set our sights on the Bahamas this season and enjoy the wonderful pristine patch of islands we have so close by.  It’s amazing to think that jewel-toned paradise is really only a 12-hour sail from the states.  How lucky we are!  All we needed was just a sliver more luck to give us a nice “no north wind” window of favorable conditions to allow us to sail from the Keys and across the Gulf Stream to the Bahamas.

In the months before our departure date from Pensacola, Phillip and I (well, and I will admit Phillip far more than me) spent many hours studying the Explorer Charts for the Bahamas making decisions about where we planned to enter the Bahamas, where we wanted to check in and what islands (called “Cays” in the Bahamas, pronounced “keys”) we wanted to sail to and visit and in what order, although knowing every plan is and will always be weather-dependent.  Having just recently completed my first Bahamas article for SAIL Magazine (thank you again, Peter Nielsen, for requesting more articles from me!) which will focus on preparing and packing for a trip to the Bahamas, Phillip and I both agree an intense study of the Explorer Charts and determinations as to where you want to go in the Bahamas and what route you want to take to explore them is a great first place to start when preparing to travel to the Bahamas.  Much of what you will need aboard will depend on how you are planning to traverse the Bahamas and what you are planning to do there as supplies are readily available in some places, limited and altogether unavailable in others.

After talking with fellow sailors back home who had cruised the Bahamas many times and taking into consideration what time of year Phillip and I were going (during December-January, when we knew we could expect many sudden and intense north fronts, the “Christmas winds,” and some chilly water and weather), we decided to make our way as far north as possible first and check in at West End.

We would then start dotting our way along the Sea of Abaco seeking protection from the northerly islands as needed when storms and heavy north winds were expected.  (And boy did they come.  I recorded 36 kts of wind on the boat one afternoon in Green Turtle Cay.  Just wait.)

With the plan to enter the Bahamas at West End, Phillip and I knew we wanted to “ride” the Gulf Stream as far as we could north before jumping out to make entry into West End.  Initially, we weren’t sure we would get a window large enough to allow us to sail all the way from Key West to West End.  If we did not, our plan was to dot along the Florida Keys to Marathon then perhaps Rodriguez Key while waiting for a good window to make the jump.  But, when we saw a beautiful two-day window blooming on the horizon, we started to top off the provisions and ready the boat to make way.  While we had a ton of fun in Key West (we always do!) meeting the new Geckos and getting to spend some time with them, seeing our old pals Brittany and Jeremiah and getting to watch their beautiful Alberg splash, as well as enjoying the many great restaurants and poolside views, we are always eager and excited to get back underway.

On Wednesday, December 20th, with expected 10-12 kt winds the first day (which would offer us a fun, comfortable sail around the Keys) and light, fluky winds of 5 kts or less the following day (which would allow us to at least motor safely across the Gulf Stream), Phillip and I decided to toss the lines and seize the window!  You’ll see in the video, Annie de-docked like a boss (I tell you I’m getting much better at this), and we then had a fantastic cruise all the way from Key West to West End, just shy of a two-day run.


Man, that’s living … 

So, is that.  With all the work comes all the rewards.  

There’s the entry to West End!

Don’t tell Pam this, but we totally broke the rule because you know what kind of winds we had throughout the entire Gulf Stream?  That’s right.  North!  We crossed with a north wind, Pammy.  I’m sorry!  But, when it’s howling at 3 kts, a north wind isn’t really going to affect the boat that much, particularly when it had been blowing from the south for a short time before.  Meaning, the sea state was just starting to turn around and we essentially crossed on a smooth, glassy lake.  It was beautiful though.  While I always prefer to have wind to sail, there is nothing that can replicate the beauty of a hull sliding through silk at sunrise.  It’s just stunning.

I hope you all enjoy the video.  I have had such a great time filming just for pleasure and putting these videos together for you all, just for pure fun.  Not to make any money from them.  Not in hopes they will get a lot of hits so I can get YouTube ad money.  Just because our views were amazing, so I clicked the camera on occasionally, and because the videos are such a vivid personal scrapbook for us.  I really will be excited to sit down when I’m 70 and watch my Atlantic-crossing movie.  Can you imagine that?  I wonder if YouTube will still be a “thing” then?  Who knows.  If any of you have read Dave Eggers’s The Circle (one Phillip and I both read in the Bahamas), apparently we all will soon be be filming and uploading every moment of our existence for all the world to see.  Heck, with the immediacy of Instagram and Facebook these days, we’re almost there.

But you know where you can truly unplug and get away?  Out there.  On the big open blue.  I can’t tell you how good it feels to be out there, nothing but satiny water all around you and nothing you have to do but eat, sleep, mend the boat and read.  I could sail offshore forever, happily, I do believe.  I hope you all love this bit.  As always, I try to capture the beauty of the voyage, the work and maintenance it requires, and the reward of having your beautiful, strong boat carry you from the shores of one country to another.  Next up, we’ll begin sharing the Bahamas with you, one Cay at a time.  Be ready to pick your jaws up off the floor because it’s breathtaking.  Stay tuned!

BV3 (VIDEO): A New Breed of Geckos in Key West!

There were!  Everywhere we went.  More than we expected.  Geckos here.  Geckos there.  Geckos extraordinaire!  You’re right, not real geckos.  I’ll admit I know not the native local habitat of geckos.  The desert, I would imagine?  This was—as I mentioned—a different breed of geckos.  The cruising kind!  Of all the fun, exciting things we were expecting to find in the Keys, a gecko overload was not one.  But that’s the beauty of chance and fate.  He stopped me by the pool in Stock Island with a sentiment I’ve heard often: “I know you from YouTube,” and there it happened.  We had stumbled upon a pair of newbie cruisers who were about to purchase, splash and move onto their first liveaboard sailboat the next day and it just so happened they had bought the s/v Lazy Gecko.  It’s amazing the happenstances that can happen out there and it is a constant reminder how truly small the cruising world is.  Fun video for you all of the lazy splash below and a surprise visit from a rather famous cruising couple.  But first, let’s get back to our Bahamas-Bound saga.

If you caught the video from our five-day voyage across the Gulf, you’ll know I got rather sick on that voyage.  The sickest, I can easily say, I have been in my adult life.  In true Annie-style, I spent the first few days of our trip trying to hide it from Phillip, telling him it was “just a sore throat,” “a little head cold, it’s almost gone.” But every time I swallowed, it felt like a fresh layer of skin was ripped off of my throat and swallowed down, leaving it raw and seething.  Day three my voice began to go out so there was no more hiding it.  I sounded like Patty and Zelma from the Simpsons.  You remember this fun clip:


That’s one sexy rasp!  Day four, my throat having been way more than “just sore” now for almost a full ninety-six hours, Phillip and I were both pretty sure I had strep throat.  And every day began with a clattering cough trying to hack phlegm up and swallow it down.  Appetizing, right?  Just wait.  Day seven, I woke in the middle of the night to the odd sensation of my eyes oozing.  I would wipe some gook out of my tear ducts, but then I could feel it puff back up under my lids, ooze out of my duct, pool up on my nose and literally drip off the bridge of my nose onto my pillow.  Nice.  Several hours in I could mash it out of my eyes by running a thumb across my puffy lids and squeezing it out like a tube of toothpaste.  Did I find it odd my eyes were oozing?  Sure!  Worrisome?  Nah.  All told, my sore throat had healed and my morning cough wasn’t too taxing.  I figured whatever nasty shit was in my head was finally making its way out—albeit out my eyeballs—and I chalked the drainage up to be a good sign.  Annie didn’t take a lot of selfies during that phase, but here was one pic Phillip snapped of me my first red-eye morning and you can see it’s not pretty.


Waiters and waitresses seemed to be afraid to serve me, or at least touch anything I had touched.  Probably smart.  While waking up several mornings in a row with lashes caked so heavily with snot clusters I had to manually pry my lids open was not fun, it did prove to be the last of my wicked strep-bronchinus-infection (we called it) and finally, somewhere around Day Ten, the Captain considered me fully-healed.  Hooray!

Why am I sharing all of this with you?  Because gross bodily stuff is really cool and interesting.  At least I think so.  But, really, I wanted to share all of this to pass along another important cruising lesson on first aid and medication: ANTIBIOTICS.  When Phillip and I shove off on an extended cruise, we like to try to get a couple of rounds of preventative antibiotics prescribed so we can have them on-board in case one of us gets a wicked infection in a location where we are not close to a clinic … like 100 miles offshore in the Gulf.  Did we have antibiotics aboard to treat Annie’s wicked illness?  Yes.  Points for us.  But, was Annie too stubborn and stupid during the first four days of her illness to take them?  Yes.  Take back those points.  I hate taking medication and I really thought it was just a pretty bad cold that was I was just about to overcome.  So, I waited.  I felt like taking antibiotics for “just a head cold” would be a waste.  I usually have them prescribed for a UTI, which I am known to get every couple of years and I wanted to be sure I had them for that if one of those flared up while we were crossing.  I would much rather have the gnarly shit I did than days and days of an untreated, raging UTI.  Any ladies out there who know the feeling would probably totally agree.  But when Phillip finally won out and I did start taking the antibiotics, I made another mistake.  (Me?  Stubborn?  Noooo … ).

I am always a ball of sunshine!

You can probably guess what it was.  Obviously, I’m trying to spare as much medication as possible and I still believed I could kick that thing on my own.  So, I did what I often do when taking antibiotics: stop-mid dose and save the rest.  That has often proved helpful.  Here, it proved decidedly detrimental.  I took the antibiotics for two days (the last two of our voyage), and I started to feel better, so I stopped.  “Must save the rest now for a burning bladder, Annie,” I told myself.  Then what happened?  My eyes started oozing and my morning cough began and my illness lasted an extra five days.  As Phillip later pointed out, if you stop an antibiotics regimen too early, the illness isn’t eliminated but, rather, educated on how to fight that particular antibiotic and it rears back twice as strong.  Mine certainly did.  So, two lessons for you here fellow cruisers (all lessons are free today): 1) carry preventative antibiotics aboard on long passages (as I mentioned, my ob/gyn nurse prescribes them for me for potential UTIs); and 2) take the whole damn dose.  Don’t pull an Annie.  Oozing eyes are not sexy.

But, back to our saga.  We made it to Key West!  Stock Island, rather, as this was the marina where we kept our boat most of the spring last year after returning from Cuba while we flew back and forth to work in Pensacola and play in Key West and we were very pleased with the security, cleanliness and efficiency of the marina at Stock Island Village.  While it is a little pricey, it is also a fabulous facility, now with a completed hotel and nice pool, lounge and bar area available for free to all marina residents that we highly recommend.


We heart Stock Island!

And, we were so glad to see it had not been damaged or wiped out entirely by Irma!  One of the really fun things we discovered about this marina, immediately after our return from Cuba, was that there is a little Cuban restaurant within walking distance that everyone claimed was “very authentic.”  Having just sailed 90 miles from that wonderful island last December, with plenty of Cuban ropa vieja, picadillo and plantains still making their way through our tummies, we were highly skeptical, but definitely intrigued.  And the little Cuban gal that runs that tight ship at Deluna’s did not disappoint.  We got a mojo pork, with beans, rice and fried plantains that definitely held its own up against our high Cuban standards.  And, when we came back to Stock Island this time, we were pleasantly surprised once again by this little Cuban cuisine gem.

“We’re having a little dock party tonight over at Deluna’s to announce our Christmas parade winners,” one of our new boat neighbors told us after he helped us dock and tie-up.  “Ahh … cool.  Maybe we’ll check it out,” Phillip and I said, not knowing whether we would in fact as we had been planning (and talking, and dreaming, and drooling) about it for days.  Our first dinner ashore after crossing the Gulf we had both agreed would be Roostica, a fabulously-decadent little pizzeria bistro in Stock Island that makes delicious wood-fired thin-crust pizzas with names like The Diablo, The Island Pie, Truffle & Mushroom.  Are you getting hungry yet?  We were.  Phillip and I—splayed out wet, exhausted and salty in our stinky foul weather gear sloshing around on passage—had been daydreaming about every oily, buttery, cheesy bite for four days.  After our first hot shore shower, it was the first place we were planning to go.  But then our dock neighbor said:

“They’re serving food and drinks, too.  For free.”

Free?!  That’s “cruiser” for “We’re going.” So we did.

And turns out by “food” they meant a tantalizing Cuban feast!  Braised pork shoulder, black beans, succulent yellow rice, yucas (Cuban-style mashed potatoes), fresh Cuban bread (“Pre-buttered? Shit yeah,” Phillip said) and sweet, fried plantains.  As much as you could eat, with a full wine glass coming every 15 minutes?  All for free?!  The decision was immediate and mutual.  Sorry Roostica.  We knew it would be there for us another evening.  The Delunas folks had tip jars out and we gave generously then hopped in line to fill a heaping plate.

Then another …

And another.  I’m not kidding.

Yes, thirds.  We had thirds.  I don’t think I’ve had thirds since Thanksgiving 2009.  Holy smokes did we eat.  But it was the perfect “Welcome back to Stock Island” event.  And then we were just stumbling distance from our boat.  Our bellies so full we could have rolled home.  It was a great way to end our first night ashore.

The next day we were planning to walk or jog to Key West.  The beach stretch on the south side of the island is really beautiful and we’ve enjoyed trekking from Stock Island to Key West on foot before.


We wanted to eat at one of our favorite places in Key West, a little French creperia that makes (don’t tell Yannick) better crepes than we had in France.  Sorry, but it’s just true.  Savory ones with mushrooms, chicken and beschamel sauce.  Or sweet ones with dark chocolate and bananas foster.  God, can you tell we’re foodies??

Another item on our agenda while in Key West was a reunion visit with an old friend from Pensacola.  Our buddy, Russ, who worked at www.PerdidoSailor.com in the shipyard under Brandon for a while, had left Pensacola a few years back on his 1969 42’ Pearson to begin his own cruising adventure and he had landed, as many do, in Key West where we heard he was working on one of the charter schooners there.  There are only like a thousand charter schooners in Key West.

But I must share one little secret Russ and I had.  Back at the shipyard in Pensacola, Russ and I … we got really close.  Physically.  I mean it!  We did.  The two of us were cramped in the bilge of our Niagara 35 for a week together rebuilding our rotten stringers back in the winter of 2015.  There’s not a lot of room in there and there was a lot of work to do.  We had to get close.  Roll that fabulous shipyard footage!

Two videos covering our rotten stringer repair for you here if you haven’t yet seen them: #52: Stumped by the Rotten Stringer Repair and #53: Rotten Stringers Repaired with Coosa Board and Fiberglass.  Russ and I put a lot of work (and 185 pieces of glass) into that repair, making our baby stronger than ever.  And, man did we rock those Tyvek suits!  High fashion.

Ahhh … good times with Russ.  It was very fun to have a reunion with him and hit up a few of the dive bars and delightfully tacky joints around Key West Harbor.  Everyone loves Schooner’s Wharf!  Say “Hey!” to Russ!  Cheers!

Another item on our to-do list while we were in Key West was give our baby some TLC.  Plaintiff’s Rest had worked quite hard chugging us across the Gulf, particularly in those gnarly conditions outside of Tampa, winds of 25 kts and 6-8 foot seas.  She had done a fantastic job and definitely deserved some pampering.  We gave her a good scrubdown right after we docked, which we usually do every time we make a passage and come into a marina.

Oh, and I did mention that bilge pump in BV1 … we discovered our forward bilge pump, a 500 gph Rule, had gone out.  For whatever reason.  Just quit working.  We figured that probably contributed to the bilge water accumulation I mentioned in BV2.  Ahhh … that explains a lot.  Good thing we brought a spare!  We popped the new one in, not too bad of a chore.  Re-wired her and we were in business.

And, Stock Island has a West Marine there so we were able to get another “spare” to replace the now-used spare.  Good to keep stock of your spares!  We also changed out the oil in Westie.  He’d run a good 38 hours bringing us across the Gulf and we usually change the oil every 50 hours, so we figured an early rotation wouldn’t hurt.  Our previous owner made a few small modifications to the engine which make it rather easy to change the oil, and a much cleaner process.  He rotated the oil filter from sitting horizontal that it now screws up and down vertically (containing the spill) and he put in an extended tube we connect to our manual pump catch-bin to pump the old oil out.  All told, this chore only takes about thirty minutes and isn’t too bad at all.  Westie certainly deserved it.

Chugging 38 hours across the Gulf had burned a little bit of oil:

And some coolant, which we topped off as well:

Using a mirror to check the gasket around the thermostat in our raw water system to make sure there wasn’t any green ooze around it signifying a leak.  “Nope!  All dry!” shouted Diesel Mechanic Annie.

And, Stock Island has a nice facility where you can dump your used oil, making this chore even easier.  Always good to properly dispose of your nasty fluids.

We also noticed some additional rust that had creeped into our stainless since we last polished (in July) and, while we had time to do it in Pensacola, we literally didn’t have the right weather for it.  The Spotless Stainless recommended the product not be used in temps less than 78 degrees.  “We’ll do it when we get south then!” the Captain decided and it was done.  We gave our gal a beautiful spit shine at the dock in Stock Island and she was glistening!

One thing we would have never expected to happen while we were there in Key West, though, was an unlikely run-in with a pack of geckos!  Do geckos run in packs?  Perhaps it was a herd, or a flock, but it was way more than we expected to find in one place.  FOUR!  And, I’m not talking about reptilian geckos.  We’re talking about the human kind.  Here’s how it went down.

Phillip and I had been lounging by the pool at the Stock Island Marina our second day there (Roostica night!  Shit yeah!) and I had a guy stop me by the awesome little tiki bar they built there.  “Hey, I know you from YouTube!” he said.  I smiled and laughed, because I do get that quite often, and promptly apologized for my Patty-and-Zelma voice.  While I did feel and sound like crap most of our Key West days, I never let it stop me from having a good time or meeting fun new cruisers!  “I’m Steve,” he said.  “My wife and I just bought a boat.  We’re going to splash tomorrow then move aboard.”

Super cool, right?  Well, wait until you see the boat they bought!  This vessel has quite the following.

Steve told me that afternoon at the bar—he and his super cool wife, Ashley were there having their necessary “Holy crap, we just bought a boat” drink—that the boat they bought was the s/v Lazy Gecko, so Phillip and I knew they were getting an awesome 1985 Alberg 37.  And, Phillip and I had planned to come watch them splash, hand over a bottle of champagne and enjoy seeing two newbie cruisers launch their cruising dreams.  But, what we didn’t know was that the geckos.  THE GECKOS.  Jeremiah and Brittany were going to be there, too.  They had flew in just for the day to finalize the deal, make sure the engine ran for the new geckos and help get Steve and Ashley secure on their new boat and safely off the dock.  When Phillip and I were walking toward the shipyard and I saw Brittany pushing Rhys in his little stroller, I jumped for joy!

It was so fun to get a spontaneous surprise visit with the Geckos.  We have only been able to connect with them in person on very few occasions.  One time they were coming through Pensacola and stopped to get a quick tour of our boat.  It was very fun to finally meet them in person.

Then we got to spend another millisecond together when we were all at the Miami Boat Show in February last year.  Say Hey to Teddy J with SailLoot!

We had also collaborated remotely doing a virtual tour of their beautiful Alberg, which you can watch here.  You’ll see Steve and Ashley are getting one heck of a bluewater boat.  In all, we’ve always enjoyed hanging out with them and it was a lot of fun to have a quick impromptu reunion in Key West.  We’re very excited for the new geckos, sailing under the name “Bella Vista” and we’re eager to see where their plans take them.  Phillip and I had some influence on their first destination.  I’ll let some of you guess where we encouraged them to go!  For now, meet the new Geckos and say hello to some old friends.  Jeremiah, Brittany, we’ll sure miss seeing you guys on the beautiful Alberg, but we’re really excited to see what the sailing future holds for you.  I’m sure Bella Vista is going to take the Alberg to many new and exciting places!

Love these crazy sexy two!

“I need an Annie selfie!” Brittany said.  “You got it!”

Bon Voyage Bella Vista!

So, tons of fun in Key West, right?  We love that quirky little colorful town.  Tons of great restaurants and tiki bars, too.  Not to mention sunset at Mallory Square.  The street performers.  Boat parades.  Pool parties.  All kinds of perks.


But, Phillip and I had our sights set on the Bahamas for a reason.  It was time to go!  But, one must never be in a hurry when cruising.  We knew one of the toughest jumps we might have to make on this journey would be across the Gulf Stream.  Pam Wall and so many other experienced cruisers had advised (very harshly but necessarily) against crossing the stream in any kind of north wind.  The Gulf Stream is a powerful current that runs south to north along the east coast of the United States and trying to cross it with any kind of north wind we had heard was like trying to run on a treadmill while someone is spraying a fire hose in your face.  Very lumpy seas and forceful current-meets-wind conditions.

When Phillip and I left the dock in Pensacola we were prepared to sail straight to the Bahamas if the weather would allow, we figured it was unlikely but possible.  When we got the weather data our fourth day of the journey across the Gulf from our router, it showed a front coming through the next couple of days with steady north winds, so a complete Pensacola-to-Bahamas passage was not advised.

We also knew we might be holed up either in Key West, Marathon or some other key (we had heard Rodriguez Key makes a good jumping off point) possibly for weeks waiting for a good window to cross the Gulf Stream, which would not be ideal but totally tolerable.  We were thrilled to find, however, that just a few short days after our landfall in Key West, a wonderful weather window was opening up soon that would likely allow us to make the jaunt from Key West all the way up to West End in the Bahamas.  Here is the window we were watching:


We checked the GRIBS, checked with friends and confirmed with our weather router this was our window!  On Wednesday late-morning, December 20th, we tossed the lines in Key West headed for West End.  Next up on the blog, we make the jump!  BV4: Crossing the Stream – Key West to West End.  Stay tuned!